How to Dig Razor Clams Without Breaking Them
There's nothing quite like the thrill of spotting that tell-tale "show" on the beach – a dimple or a squirt of water that signals a razor clam lurking just beneath the sand. But let's be honest, the excitement can quickly turn to frustration when your shovel or clam gun hits the shell just wrong, sending fragments flying and leaving you with a broken clam. We've all been there, feeling that pang of disappointment. This guide is here to walk you through the proven techniques and crucial tips to help you consistently dig whole, beautiful razor clams, making your next trip to Washington's coast a resounding success.
Understanding the Fragile Nature of Razor Clams
Before we even talk about tools and techniques, it’s essential to appreciate what makes razor clams such a challenging quarry. They aren't like hard-shelled clams you might find in the mud; they are built for speed and evasion in the constantly shifting sands of the open coast. Understanding their unique characteristics is the first step to mastering the dig.
Why Razor Clams Break So Easily
Razor clams, as their name suggests, have incredibly thin, brittle shells, often described as being like fine china. This delicate shell is perfectly adapted for their lightning-fast burrowing action. When disturbed by the vibrations of a shovel or the shadow of a clam gun, they don't just sit there; they take off. They can burrow an astonishing foot or more in a matter of seconds.
The challenge arises because this speedy escape mechanism means they are constantly moving away from your attempt to capture them. If your digging tool strikes the clam directly, the shell, unable to withstand the pressure, will often fracture. It's not usually a sign of clumsy digging as much as it is a testament to the clam's impressive evasive maneuvers and the inherent fragility of its design. The deeper they go, and the faster they move, the harder it is to avoid a direct hit, leading to those frustrating broken shells that no one wants.
Identifying Prime Razor Clam Habitat
Razor clams thrive on the exposed, sandy ocean beaches of Washington's coast, particularly from Long Beach north to Copalis, Mocrocks, and Kalaloch. They prefer areas with consistent surf action that keeps the sand oxygenated and provides them with plenty of plankton to filter feed. But knowing the general area isn't enough; you need to spot their "shows" to pinpoint their exact location.
A "show" is the tell-tale sign that a razor clam is just beneath the surface. It can manifest in a few ways:
- The Dimple: This is the most common and often easiest to spot. As the clam retracts its neck (siphon) into the sand, it leaves a small, distinct indentation, often round or oval, about the size of a dime or quarter. These are usually visible as the tide recedes and the water drains off the sand, or sometimes even in shallow water.
- The Squirt: When a clam is disturbed by your footsteps or the receding tide, it might squirt a small stream of water into the air as it retracts its siphon or burrows deeper. This is a clear indicator that a clam is present, and often a larger one.
- The "Keyhole": Sometimes, especially on harder sand, the show might look less like a dimple and more like a small, elongated keyhole shape.
The key to successful clamming begins with learning to spot these shows quickly, especially on a busy beach where thousands of other clam diggers are also looking. The more distinct the show, the more likely you are to find a clam directly beneath it. Look for areas where the sand is still wet but not completely covered by water, as the receding tide often reveals the best shows.
Essential Gear for Successful Razor Clamming
While your bare hands might work in a pinch for some shellfish, razor clamming demands specific tools to be effective and, more importantly, to keep those delicate shells intact. Having the right gear isn't just about efficiency; it’s about respect for the resource and maximizing your chances of a successful, unbroken harvest.
The Right Digging Tool: Shovel vs. Tube
The choice between a shovel and a clam tube (often called a clam gun) is perhaps the most fundamental decision for a razor clammer. Both are effective, but they operate on different principles and can excel in different conditions or for different digging styles. You can often find a great selection of either tool on sites like Amazon, allowing you to compare styles and prices from the comfort of your home before hitting the beach.
The Clam Shovel: Traditional and Versatile
- Description: A specialized shovel designed for clamming. It's usually narrower and longer than a garden shovel, with a slightly cupped blade and a long handle. Some have a more pronounced cup, others are flatter.
- Pros:
- Versatility: Excellent for varied sand conditions, from soft to firm. If the sand is very wet and loose, a shovel can sometimes be more forgiving than a tube.
- Power & Reach: Allows for powerful, deep scoops, which can be useful for fast-burrowing or particularly deep clams.
- Simplicity: No moving parts, nothing to clog. It's a straightforward tool.
- Physical Activity: Many diggers enjoy the physical workout of shoveling.
- Cons:
- Learning Curve: Requires more technique to avoid breaking clams. A poorly aimed shovel can easily smash a clam.
- Messier: You'll be throwing a lot of sand, potentially getting yourself and those around you covered.
- Back Strain: Can be more strenuous on your back, especially if you're not used to bending and scooping repeatedly.
The Clam Tube (Clam Gun): Precision and Less Physical Strain
- Description: A hollow, cylindrical tube, typically made of PVC or metal, with handles at the top and a small vent hole near the top. It works by creating a vacuum.
- Pros:
- Less Physical Strain: Generally easier on the back and joints, as it relies on suction rather than brute force.
- Precision: Allows for a very focused dig directly over the clam, minimizing disturbed sand.
- Cleanliness: Less sand thrown around compared to a shovel.
- Higher Success Rate (for some): Many find it easier to get unbroken clams with a tube once they master the technique.
- Cons:
- Conditions Specific: Can struggle in very rocky, gravelly, or extremely soft, soupy sand where it's hard to get good suction.
- Clogging: The vent hole can get clogged with sand if not cleared, reducing suction.
- Initial Cost: May be slightly more expensive than a basic clam shovel.
Many experienced diggers own both and switch based on sand conditions or personal preference. If you're just starting out, a good quality clam gun might offer a less frustrating introduction to clamming and a higher likelihood of bringing home unbroken clams.
Beyond the Digging Tool: What Else You'll Need
While the clam shovel or tube is your primary weapon, a successful clamming trip requires a few other key items. Don't underestimate the importance of these accessories, as they can significantly enhance your comfort, safety, and overall success. To learn more about other essential items, check out our guide on Tools You Need for Razor Clam Digging.
- Clam Net or Bag: You'll need something to hold your freshly dug clams. A mesh bag or a specialized clam net that attaches to your belt is ideal. This keeps your hands free and allows water and sand to drain, preventing your container from getting too heavy with excess weight. Plastic buckets work too, but they can be cumbersome. Remember, you're usually limited to a certain number of clams per person, so make sure your container is appropriately sized.
- Light Source (for night digs): Many of the best razor clam tides happen at night, especially during the fall and winter seasons. A good headlamp is absolutely critical. Look for one that's bright, waterproof, and has a red-light setting (which can sometimes be less disruptive to other clammers and better for preserving your night vision). A backup flashlight is also a smart idea.
- Appropriate Footwear: The beach can be cold, wet, and often has hidden obstacles like logs or rocks. Waterproof boots, like rubber boots or waders, are essential to keep your feet dry and warm. Neoprene boots offer excellent insulation for colder months.
- Warm, Waterproof Clothing: Washington's coast is famous for its unpredictable weather. Even on a seemingly calm day, a rogue wave or a sudden squall can soak you through. Dress in layers, and always have waterproof outer layers (jacket and pants) to stay dry and comfortable. Cold, wet clammers are miserable clammers!
- Gloves: Protect your hands from the cold, wet sand, and potential scrapes from clam shells or other debris. Waterproof work gloves or insulated fishing gloves are excellent choices.
- Catch Record Card and Fishing License: This is non-negotiable! Every clammer aged 15 and older needs a valid Washington fishing license that includes shellfish, and a separate Catch Record Card for any species that requires one (which razor clams do not, but salmon and steelhead do, so it's good practice to know). Make sure to check the specific requirements, but for razor clams, you definitely need a shellfish license. For a deep dive into licenses, read our Washington Fishing License Guide for Nonresidents or Resident vs Nonresident Fishing Licenses in Washington. You also need to know How Bag and Possession Limits Work in Washington to avoid violations.
Step-by-Step Techniques for Extracting Unbroken Clams
Now for the main event: how to actually get those clams out of the sand without turning them into a puzzle. Both shovel and clam tube methods aim for the same result, but the execution differs significantly. The key to both is precision, speed, and understanding the clam's escape route.
The Shovel Technique: The Art of the Quick Scoop
The shovel technique is a classic for a reason, but it takes practice to master the finesse required to extract an unbroken clam. It's less about brute force and more about strategic digging.
- Spot Your Show: As discussed, identify a clear clam show. This is your target.
- Position Yourself: Stand on the ocean side (downcurrent) of the clam show. This is crucial because clams almost always dig straight down or slightly towards the ocean. By standing here, you give yourself the most room to work without fear of the clam digging further away from you.
- Initial Dig (The Trench): Plant your shovel about 6-8 inches away from the clam show, towards the ocean side. Dig down quickly, creating a small, V-shaped trench directly behind the clam show (from your perspective). The goal isn't to hit the clam yet, but to create a void for the sand to fall into and to give you room to maneuver.
- Angle and Speed: Once you have that initial trench, quickly insert your shovel at a sharp angle (around 45 degrees), aiming underneath and slightly behind where you estimate the clam to be. The shovel should penetrate deeply. Think of it as scooping the sand around and beneath the clam, rather than trying to spear it.
- Lift and Locate: With a swift motion, lift the sand from the trench. The goal is to bring up a large plug of sand. As you lift, often the clam will be exposed, either sitting in the sand you've removed or still partly in the hole.
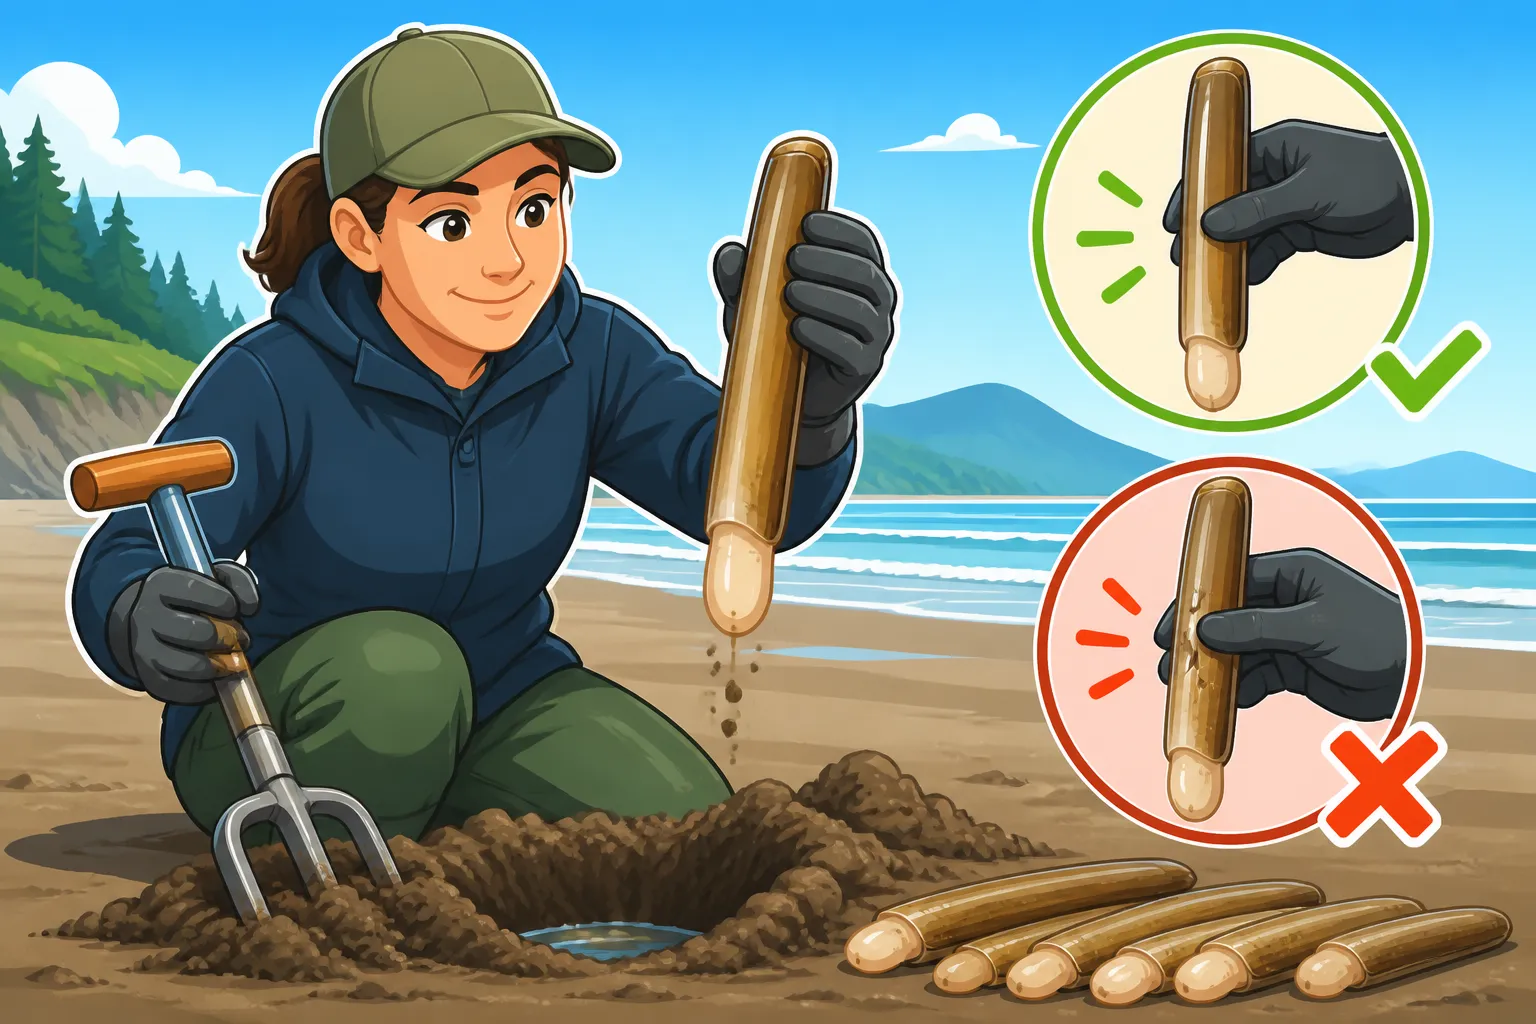
- Retrieve Carefully: If the clam is exposed, reach in quickly and grasp it firmly. Razor clams have a strong foot, so a firm grip is necessary. Be gentle with the shell itself. If the clam is still burrowing, you might need to quickly scoop again, always trying to get behind it and underneath it. Speed is key, as they won't hesitate to dig deeper if given a chance.
Practice makes perfect with the shovel. Your first few might be a bit mangled, but you'll quickly develop a feel for the angle and the speed needed to scoop around the clam.
The Clam Tube Technique: Suction Power for Success
Many clammers swear by the clam tube for its relative ease and higher success rate with unbroken clams. It’s all about creating and breaking a vacuum.
- Spot Your Show: Again, a clear show is paramount.
- Position the Tube: Place the open end of the clam tube directly over the clam show. Ensure it’s centered as best as possible.
- Push Down Firmly: With both hands on the handles, push the tube straight down into the sand with steady, firm pressure. You want to go deep enough to get past where the clam might have started to burrow – at least 12-18 inches, or until you feel resistance. You want to surround the clam within the tube.
- Block the Vent Hole: Once the tube is pushed down, quickly cover the small vent hole at the top of the tube with your thumb or palm. This creates the vacuum.
- Pull Up and Wiggle: While keeping the vent hole covered, pull the tube straight up out of the sand. You might need to wiggle it slightly or twist it to break the suction and lift the sand plug. If the sand is very dense, it might take a bit of effort.
- Release the Clam: Once the tube is clear of the hole, move it slightly aside, then release your thumb from the vent hole. The plug of sand and hopefully your clam will drop out.
- Retrieve: Pick up your clam. Sometimes it's right on top of the sand plug; other times, it's burrowed a bit into it.
The clam tube method is generally cleaner and less physically demanding than the shovel, especially for those with back issues. The key is getting good suction and pulling straight up.
Reading the Sand and Minimizing Damage
Beyond the specific tools, success in razor clamming often comes down to subtleties – knowing how to "read" the sand and approach the clam.
- Anticipate the Burrow: Remember, clams dig straight down or slightly oceanward. Always approach and dig from the ocean side of the show, giving you an advantage. If you dig on the land side, the clam will simply dig away from you, making it harder to catch.
- Feel for the Clam: Sometimes, especially with a shovel, you might not see the clam right away. As you dig, gently feel the sand with your fingers. You can often detect the hard, smooth shell before you see it. If you feel it, adjust your angle immediately to scoop around it.
- Speed is Your Friend: Razor clams are incredibly fast. Hesitation gives them more time to burrow deeper. Once you start digging, commit to it and work quickly. The longer you take, the harder it will be to get to them.
- Beware of Waves: Always be mindful of incoming waves, especially on night digs. They can fill your hole, wash away your clam, or even knock you over. Time your digs between larger sets. For more on how tides and seasons affect your trip, explore When Washington's Halibut Season Opens or Razor Clam Digging Season on the Washington Coast.
Common Pitfalls and Troubleshooting
Even with the best techniques and gear, razor clamming isn't always smooth sailing. Clams are wild creatures, and they don't always cooperate. Knowing how to troubleshoot common issues can save your trip from frustration.
Dealing with Deep Diggers and Fast Retreaters
You've spotted a perfect show, dug quickly, but the clam just keeps going down, down, down. It's a common scenario, especially with larger, more experienced clams.
- The "Follow-Up" Dig: If your first attempt with a shovel doesn't yield the clam, don't give up! Quickly clear the sand from your first hole and try to identify the clam's new position. Often, you'll see a smaller dimple at the bottom of your initial hole. Dig again, trying to get behind it and underneath it, just as you did before, but deeper. It's a race against time, so be swift.
- The Second Scoop (Shovel): For really deep clams, you might need to take a second, larger scoop of sand immediately after the first. Instead of trying to pinpoint the exact location again, just extend your original hole deeper and wider, hoping to encompass the clam in a larger sand plug.
- Adjusting Tube Depth: With a clam tube, if your first pull doesn't bring up the clam, it likely means you didn't push the tube deep enough, or the clam moved out from under it. Reinsert the tube deeper, trying to center it over where the clam might now be, then re-establish suction and pull. Sometimes, a slight twist of the tube as you push down can help ensure it cuts through the sand effectively.
- Don't Chase Indefinitely: While persistence is good, there comes a point where an extra deep or incredibly fast clam might be better left alone. If you've dug a couple of feet and it's still evading you, trying to dig a 3-foot-deep hole in wet sand can be exhausting and unproductive. Sometimes, it's better to move on to the next show.
When a Clam Breaks: Salvaging Your Catch
It happens to the best of us. Despite your best efforts, you hear that sickening crack or pull up a clam with a shattered shell. Don't despair, and don't discard it!
- Salvage the Meat: Even a broken clam often has perfectly good meat. If the clam is mostly intact but just cracked, you can usually still harvest the meat. Simply remove it from the broken shell pieces as gently as possible. If it's completely shattered, you'll need to carefully pick out all the edible portions (the foot, body, and siphon). It might not be as pretty, but it's still delicious.
- Count Towards Your Limit: This is very important. Even a broken clam, if you retrieve the edible portions, still counts towards your daily bag limit. You cannot simply discard a broken clam and dig another one to replace it. This is a critical regulation designed to prevent waste and overharvesting. The intent is that once you've disturbed a clam and attempted to harvest it, it's considered part of your limit. Always adhere to Washington Fishing Regulations Every Angler Should Know to avoid penalties.
- Learn from the Experience: A broken clam, while frustrating, is a learning opportunity. What went wrong? Did you hit it with the shovel? Was the tube off-center? Did it dig exceptionally fast? Reflect on the experience and adjust your technique for the next show. Every dig, successful or not, refines your skills.
Choosing Your Clam Digging Tool: Shovel vs. Tube
Deciding which tool to use can depend on several factors, including your physical condition, the sand consistency, and your personal preference. Here’s a quick comparison to help you choose:
| Feature | Clam Shovel | Clam Tube (Clam Gun) |
|---|---|---|
| Ease of Use (Beginner) | Moderate – requires more technique | Easier – less physical exertion, more forgiving |
| Best Sand Conditions | Versatile – good in soft to firm sand, mixed gravel | Best in moderately firm, uniform sand |
| Physical Effort | High – bending, scooping, lifting | Low to Moderate – pushing down, pulling up |
| Precision | Less precise, wider hole | More precise, focused dig directly over show |
| Cleanliness | Messier – throws sand | Cleaner – contained sand plug |
| Risk of Breaking Clam | Higher – direct impact more likely if rushed | Lower – suction method reduces direct impact |
| Cost | Generally lower | Potentially higher, but varies |
Ultimately, the best way to determine which tool works for you is to try both if possible. Many experienced clammers own both a shovel and a clam tube and switch between them depending on the conditions and how they feel that day. What matters most is that you're comfortable and confident with your chosen method, as that will lead to more unbroken clams and a more enjoyable experience on Washington's beautiful coast.
Disclaimer
This article is for general informational purposes only and does not constitute professional advice. Laws, prices and regulations vary by location and change over time. Consult a qualified professional for guidance on your specific situation.