Tools You Need for Razor Clam Digging
There’s nothing quite like the thrill of a successful razor clam dig on a Washington beach – the salty air, the crashing waves, and the incredible reward of those delicious bivalves. But let’s be honest, showing up unprepared can turn a dream outing into a cold, wet, and frustrating nightmare. This guide is all about making sure you have every essential tool in your arsenal, so you can focus on the fun of the dig, not the fumbling and frustration that comes from not having the right gear.
The Essential Digging Implements: Shovels and Clam Guns
When you hit the beach for razor clams, your primary weapon against the sand is either a clam shovel or a clam gun. Deciding between the two really depends on your personal preference, the type of beach you’re on, and frankly, what feels most comfortable in your hands after a few hours of exertion. Many seasoned diggers even keep both handy, switching them out depending on the conditions.
Choosing Your Clam Shovel or Gun
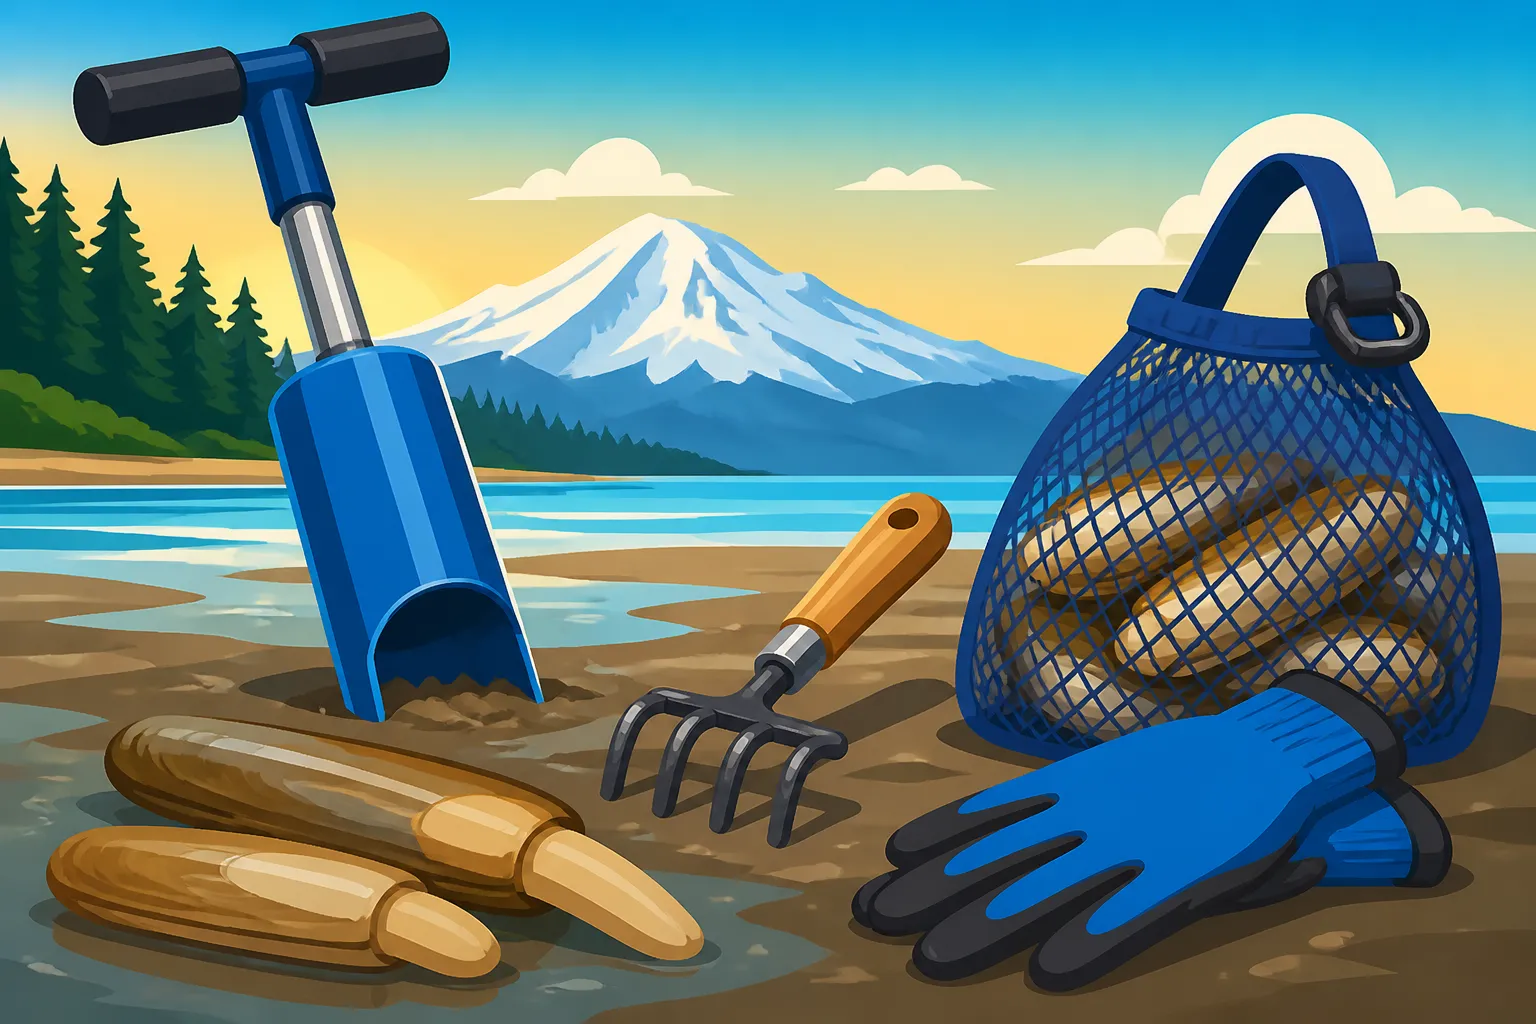
A good clam shovel isn't just any old garden shovel you grab from the shed. These are purpose-built tools, typically featuring a long handle (to save your back, bless its cotton socks!) and a narrower, sometimes slightly curved or offset steel blade. The design is crucial because you're not just digging a hole; you're often trying to follow the "show" – that tell-tale dimple in the sand that signals a clam beneath – with precision and speed. A narrower blade lets you get closer to the clam without damaging its delicate shell. The frustration of trying to dig with a wide garden shovel, just to have the clam squirt away or get broken, is a rite of passage for many new diggers, but it’s one you can easily avoid with the right tool. You’ll find a great selection of these specialized shovels online, even on platforms like Amazon, where you can compare different handle lengths and blade designs.
Then there's the clam gun. This fascinating piece of equipment works on the principle of suction. Imagine a long cylinder, usually made of PVC or stainless steel, with a handle at the top and an opening at the bottom. You push it into the sand around the clam's show, cover a small hole on the handle with your thumb to create a vacuum, and then pull it straight up, bringing a cylinder of sand – and hopefully, your clam – with it. Clam guns are particularly effective in soft, wet sand where the clams might be a bit deeper or the sand collapses easily with a shovel. They can be less strenuous on your back, which is a huge plus for longer digs or for those with mobility concerns. However, they can also be heavier to carry and might take a bit of practice to master the technique. The suction method is a different art form than the shovel, but once you get it, it can be incredibly efficient.
Illuminating Your Night Digs: Headlamps and Lanterns
Let’s talk about those amazing night digs. Washington’s best razor clam tides often happen after dark, under the glow of the moon and your trusty headlamp. Trying to dig clams in the pitch black is not only impractical but downright unsafe. You’ll trip, you’ll lose your gear, and you certainly won’t see those crucial clam shows.
A reliable light source is non-negotiable. Most experienced diggers opt for a headlamp. Why a headlamp? Because it keeps your hands free – critical when you’re wrestling a clam out of the sand, adjusting your gear, or even just holding your clam bag. Look for a headlamp that’s bright enough to penetrate the darkness (a good lumen count is your friend here), has a long battery life (you don’t want it dying mid-dig!), and ideally, is waterproof or at least water-resistant. The coastal weather can be unpredictable, and a sudden drizzle or splash from a rogue wave shouldn’t end your hunt. Some headlamps even have a red light setting, which can be less startling to your night vision and sometimes helps you spot clam shows better without washing them out. Carrying a backup light source, like a small handheld flashlight or a secondary headlamp, is always a smart move. There's nothing worse than being out on a dark beach with a dead battery and only the distant lights of civilization to guide you.
For general camp setup or illuminating a broader area if you're with a group, a larger lantern can also be useful, but for the actual digging, your headlamp is king. Ensure all your lights are fully charged or have fresh batteries before you head out, and toss a few spares into your pack.
Staying Comfortable and Keeping Your Catch Fresh
The Washington coast is beautiful, but it can also be brutally cold and wet, even on what seems like a mild day. Preparing for the elements and knowing how to properly handle your catch are just as important as having the right digging tool.
The Right Bag or Bucket for Your Catch
Once you’ve successfully pulled a clam from the sand, what do you do with it? You can’t just toss it in your jacket pocket (unless you like sandy pockets and potentially broken shells!). You need a proper container to hold your precious bounty. The gold standard for razor clams is a mesh bag. Why mesh? Because it allows the clams to drain and stay cool, but more importantly, it lets seawater circulate around them. Contrary to what some might think, you don't want to keep your clams in fresh water; it can actually kill them quickly. A mesh bag, often with a drawstring or clip closure, can be slung over your shoulder, making it convenient to carry as you move down the beach. This way, your hands remain free for digging.
Alternatively, some diggers prefer a sturdy bucket. A five-gallon bucket is a classic choice, offering good capacity. While it doesn't offer the same drainage as a mesh bag, a bucket is excellent for transporting clams, especially if you add some fresh seawater from the surf to keep them happy and hydrated for the short trip back to your vehicle. The main drawback is having to carry it, which can get heavy quickly once it fills up. The ultimate setup often involves using a mesh bag during the dig itself for easy mobility, then transferring the clams to a bucket with some seawater for the journey home. Just remember to check your How Bag and Possession Limits Work in Washington before you head out, so you know how many you can legally keep!
Waterproof Gear and Layers: Battling the Elements
This isn't a fashion show; it's clam digging on the Washington coast. The key words here are "waterproof" and "layers." You will be getting wet. Period. Whether it’s from crashing waves, unexpected rain, or just the damp sand, moisture is inevitable.
Waders: Chest waders are an absolute game-changer. They keep you dry from your chest down to your feet, allowing you to walk into the surf a bit to find clams in the lower tide zones without soaking your pants. Neoprene waders offer insulation, which is a huge bonus in the chilly coastal air. Nothing saps your enthusiasm faster than cold, wet legs.
Rain Gear: A good quality, waterproof (not just water-resistant!) rain jacket and pants are essential, even if the forecast looks clear. Conditions can change rapidly, and spray from the ocean is a constant factor. Look for something that allows for movement – you'll be bending, kneeling, and digging. Layers underneath your waterproof shell are equally important. Think wool or synthetic base layers, fleece mid-layers, and then your waterproof outer shell. Cotton is a clam digger’s enemy because it absorbs moisture and stays cold.
Gloves: Waterproof gloves are often overlooked but incredibly valuable. Your hands will be in and out of cold, wet sand and water. Cold hands make everything harder, from holding your shovel to feeling those subtle clam shows. Neoprene gloves or waterproof insulated gloves are excellent choices. Again, you can often find good, affordable options on Amazon that are specifically designed for outdoor wet work.
Being soaked and shivering on the beach is not only uncomfortable, it can be dangerous. Investing in good waterproof gear means you can stay out longer, dig more effectively, and enjoy the experience without constantly wishing you were somewhere warm and dry.
Essential Items for Safety and Convenience
Beyond the core digging gear, there are several items that will dramatically improve your experience and ensure your safety. These are the things that separate the prepared pro from the struggling novice.
The All-Important Cooler with Ice
Once you’ve collected your limit of razor clams, the clock starts ticking on their freshness. You need a reliable way to keep them cool on the drive home. A sturdy cooler filled with ice is indispensable. Don't rely on the clams staying cool in a bucket of seawater in your trunk – that seawater will warm up quickly, especially if you have a bit of a drive.
When you get to your vehicle, transfer your clams (still in their mesh bag or bucket) into the cooler, nestled on top of the ice. The goal is to keep them chilled without submerging them directly in melted freshwater ice, which can cause them to open and lose their brine. A small plastic container or a barrier between the ice and the clams can work well to prevent direct contact with freshwater. Keeping your clams cold from the moment you leave the beach significantly extends their freshness and quality, ensuring they taste as good as they possibly can when you finally cook them up. This is particularly vital for those longer drives back from coastal spots like Long Beach or Copalis.
Protecting Your WDFW License and Catch Card
Ah, the paperwork! Even for something as primal as clam digging, there are rules, and you need to have your official documents in order. In Washington, a valid fishing license (which covers shellfish) is required, and often, a When a Catch Record Card Is Required in Washington for certain species or areas. Wardens are on the beaches, and they will check. Getting cited for not having your license or a properly filled-out catch card is a surefire way to ruin your day and lighten your wallet.
The problem? Paper documents and wet, sandy beaches don't mix well. Invest in a small, waterproof pouch or a sturdy laminated license. Many diggers keep their license and catch card in a Ziploc bag tucked into an inside pocket of their rain gear. It sounds simple, but the frustration of pulling out a soggy, illegible license or a ruined catch card is real. You need to be able to access them quickly and keep them pristine. Always make sure to fill out your catch card immediately upon retaining a clam, following all the specific instructions for Information Required on a Washington Catch Record Card.
Proper Footwear for Mud and Sand
Your feet are your foundation on the beach, and they need to be protected. Old sneakers simply won't cut it. You need footwear that can handle wet sand, potential mud, and cold water. Tall rubber boots or, ideally, your waders (which typically have integrated boots) are the best options.
Look for boots with good traction, as the wet sand can be surprisingly slick, especially where waves are receding. Warmth is also a factor; being out in the cold for hours with numb toes is miserable. If you’re not using waders, make sure your boots are high enough to prevent water from sloshing over the top when you step into a shallow wave or a deeper depression. Layering warm wool or synthetic socks inside your boots will provide extra comfort and insulation. Your feet will thank you after a long night of stomping around the beach looking for those elusive dimples.
Post-Dig Essentials: Cleaning and Storage
The digging is only half the battle! Once you’re home, you’ve got to process those delicious clams. Having the right tools for cleaning and storage will make this final step much smoother and more enjoyable.
Tools for Cleaning Your Clams
Cleaning razor clams is a bit of an art, but with a few simple tools, it becomes much easier. First, you'll need a good, sharp kitchen knife. A fillet knife or a small, sturdy chef's knife works well for opening the clam and separating the meat from the shell. The goal is to efficiently remove the inedible parts (like the gills, stomach, and digestive tract) while keeping the tasty foot, neck, and siphon intact. There are plenty of tutorials online demonstrating the best techniques, but a sharp knife is key to a clean job.
Some diggers also like to have a small, stiff brush or even a dedicated clam rake to help scrub away any stubborn sand or grit that might cling to the clam meat. While you’ll often rinse the clams thoroughly under cold water, a brush can help ensure you get every last bit of sand off, preventing that gritty surprise when you sit down to eat.
Proper Storage for Maximum Freshness
After cleaning, you’ll need to store your clam meat properly. Air-tight containers or heavy-duty freezer bags are essential. If you plan to eat the clams within a day or two, simply store them in an air-tight container in the coldest part of your refrigerator.
For longer storage, freezing is the way to go. Flash-freezing the individual pieces on a baking sheet before transferring them to a freezer bag can prevent them from clumping together, making it easier to portion them out later. Vacuum sealing is another excellent option for freezer storage, as it removes all air and prevents freezer burn, preserving the flavor and texture for months. Some people even like to add a bit of their own clam juice or a light brine solution to the freezer bags before sealing, believing it helps maintain moisture and flavor. Whatever method you choose, proper storage ensures that the effort you put into digging those clams translates into delicious meals down the line.
Remember, razor clam digging is more than just a hunt for shellfish; it's an experience. Being prepared with the right tools ensures that experience is as enjoyable and rewarding as possible. From the initial dig to the final feast, every step can be smooth and satisfying with a little foresight and the right gear. Happy digging!
Disclaimer
This article is for general informational purposes only and does not constitute professional advice. Laws, prices and regulations vary by location and change over time. Consult a qualified professional for guidance on your specific situation.