Descending Devices for Rockfish and How to Use One
It's incredibly disheartening when you reel in a beautiful rockfish from the depths, only to see its eyes bulging and stomach protruding, knowing that its chances of survival, even if released, are slim. This phenomenon, known as barotrauma, has long been a challenge for bottomfish anglers in Washington, but thankfully, there's a simple yet powerful tool that can dramatically increase survival rates: the descending device. This guide is here to walk you through exactly what these devices are, why they're so crucial, and how to use one effectively to give those fish a fighting chance.
Understanding Barotrauma in Rockfish
Imagine taking a deep breath at sea level and then suddenly being transported to the summit of Mount Everest without any time to acclimate. Your body would react violently to the sudden change in pressure. While rockfish don't breathe air in the same way, a similar, albeit inverse, process happens to them when they're rapidly brought up from deep water. It's not just an inconvenience for the fish; it's often a death sentence if not addressed.
What Happens When a Fish Comes Up Too Fast?
At greater depths, the pressure on a fish's body is immense. Many fish, especially bottom-dwelling species like rockfish, have a swim bladder – an internal, gas-filled organ that helps them maintain buoyancy at different depths. Think of it like a submarine's ballast tanks. When a fish is brought up quickly from deep water, the external pressure rapidly decreases, but the gas inside its swim bladder expands dramatically, just like a balloon inflating as it rises.
This uncontrolled expansion can cause a cascade of internal injuries. The swim bladder can rupture, pushing other organs out of place. Their eyes might bulge out (exophthalmia), their stomach might evert through their mouth, and internal tissues can be damaged. These visible signs, while dramatic, are just the tip of the iceberg; the internal trauma can be severe and irreversible without intervention. A fish suffering from severe barotrauma can't swim back down on its own; it will float helplessly on the surface, making it an easy meal for predators or condemning it to a slow death.
Why Certain Fish Are More Susceptible
Not all fish are equally affected by rapid changes in pressure. Fish species that are primarily found in shallow waters or those that have an open connection between their swim bladder and their esophagus (physostomous fish, like salmon and trout) can "burp" out excess gas relatively quickly. They're built for more vertical movement in the water column.
Rockfish, however, are physoclistous, meaning their swim bladder is closed. They regulate gas internally, a slower process that's adapted for gradual depth changes, not rapid ascent. This evolutionary design makes them incredibly vulnerable to barotrauma when caught and reeled up from substantial depths, even as shallow as 30-50 feet. Their bodies simply aren't equipped to compensate for the sudden pressure drop. This is why you'll see a healthy salmon released swim away strongly, while a rockfish from deep water might float belly-up, even if handled carefully. Learning to identify these species and understanding their unique physiology is key to responsible angling, and you can learn more about different bottom-dwelling fish in Rockfish Species Along the Washington Coast.
The Importance of Releasing Rockfish Properly
Beyond the obvious ethical considerations of preventing unnecessary suffering, there are critical conservation reasons for proper rockfish release. Many rockfish species are long-lived and slow-growing, making them particularly susceptible to overfishing. Their populations can take decades to recover. Washington has specific regulations in place to protect these species, and in many marine areas, certain rockfish species must be released, or there are strict bag limits for those that can be kept.
By using a descending device, we significantly increase the survival rate of released rockfish. This helps maintain healthy populations, ensuring that future generations of anglers can still enjoy these fascinating fish. It's not just about complying with the rules; it's about being a responsible steward of our marine resources. Your actions directly contribute to the health of the ecosystem.
What Exactly Is a Descending Device?
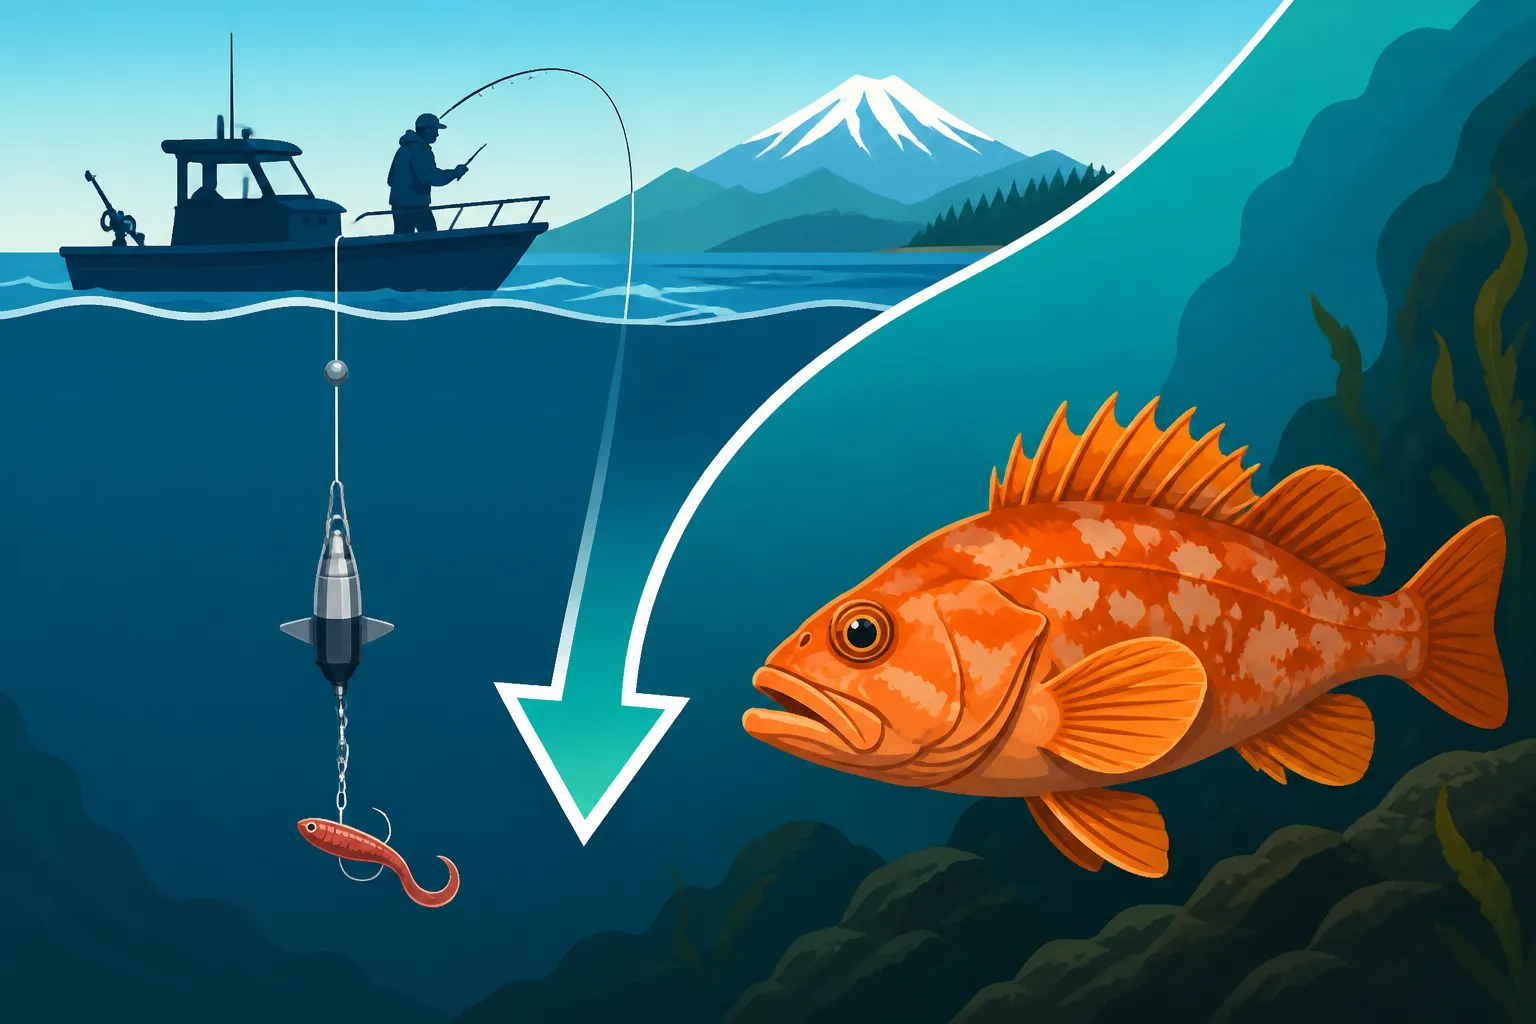
So, you understand the problem. Now, let's talk about the solution. A descending device is essentially a tool designed to rapidly return a fish suffering from barotrauma back to the depth from which it was caught. By reintroducing the fish to higher pressure quickly, the expanded gases in its swim bladder are recompressed, allowing its internal organs to return to their normal positions and function.
Types of Descending Devices
There are a few main types of descending devices available to anglers, each with its own advantages. You can often find a good selection of these on retail sites like Amazon, or at your local tackle shop.
- Weighted Clamp or Lip Gripper Devices: These are perhaps the most common and easiest to use. They typically consist of a heavy weight (often a few pounds) attached to a sturdy line, with a clamp or lip-gripping mechanism at the end. The clamp attaches to the fish's lip, jaw, or fin, and the weight then pulls the fish rapidly back down. Once the desired depth is reached (or the line goes slack), a quick tug releases the fish. Examples include devices like the "SeaQualizer" or various unbranded weighted grippers.
- Inverted Hook or Barbless J-Hook Devices: These work by attaching a weighted, barbless hook (often an inverted one, or one specifically designed for this purpose) into the soft tissue around the fish's mouth or gill plate. The weight then sinks the fish. The design of these hooks is meant to detach easily with a sharp tug or when the fish struggles at depth. Some anglers simply modify a heavy jig with a single, large barbless hook for this purpose.
- Recompression Chamber Devices: While less common for individual anglers, these devices are essentially small, weighted cages or tubes where the fish is placed. The entire chamber is lowered, recompressing the fish, and then opened at depth to release it. These are often used in scientific studies or by commercial operations that need to ensure maximum survival. They are typically more cumbersome for recreational anglers.
Each type has its proponents, and the best choice often comes down to personal preference, the size of the fish you're targeting, and how quickly you need to deploy it. Regardless of the type, the core principle remains the same: get the fish back down, fast.
How They Work, Step-by-Step
Let's break down the general mechanics of how a weighted clamp or inverted hook device works, as these are what most recreational anglers will encounter.
First, you need to have the device rigged and ready. This means having the weight attached to a stout line (often 50-100 lb test monofilament or braided line) and the clamp or hook mechanism secured to the end of that line. You'll typically spool this line onto a spare reel or a hand line for easy deployment.
Once you've caught a rockfish showing signs of barotrauma and have determined it needs to be released (perhaps it's a protected species or you've already met your bag limit, as discussed in Rockfish Bag Limit in Puget Sound), you carefully unhook it. The key is to minimize the fish's time out of water.
Next, you securely attach the descending device. If it's a lip gripper, you clip it firmly but gently onto the fish's lower jaw. If it's an inverted hook, you carefully insert it into the fleshy part of the upper or lower jaw, ensuring it's not piercing an eye or vital organ. The weight then takes over, pulling the fish swiftly back down to the desired depth.
As the fish descends, the increasing water pressure gradually recompress the gases in its swim bladder. You'll often feel the line go slack once the fish reaches the bottom or a depth where it can swim off on its own. A sharp tug on the line will typically disengage the clamp or hook, releasing the fish to swim away, usually with surprising vigor once it's recompressed. The goal is to return the fish to roughly the depth it was caught from, or at least to a depth where it can actively swim down further.
DIY vs. Commercial Options
When it comes to descending devices, you've got choices. You can absolutely buy a ready-made, commercially manufactured device, or if you're a bit handy, you can rig one up yourself.
Commercial options offer convenience and often come with features designed for ease of use and durability. Brands like Shelton Products (with their "Fish Releaser") or various products you might find on Amazon have refined designs, often using corrosion-resistant materials and reliable release mechanisms. They're typically designed to be foolproof, which is great when you're dealing with a stressed fish and trying to work quickly. They also sometimes incorporate adjustable weights or specialized clips for different fish sizes.
On the flip side, many anglers choose to create their own DIY versions. This often involves a heavy lead weight (think a few pounds, like a dive weight or a large cannonball sinker) attached to a heavy mono or braid leader, with a strong, barbless J-hook or a sturdy bulldog clip at the end. The advantage here is cost savings and the ability to customize the weight and attachment point to your specific needs. However, the homemade versions might not be as smooth or have as reliable a release mechanism as purpose-built commercial ones. If you go the DIY route, make sure your components are strong and won't fail when you need them most. Safety for both you and the fish should be paramount.
How to Use a Descending Device Effectively
Using a descending device isn't rocket science, but there's a knack to doing it effectively to maximize the fish's chances of survival. A hurried or improper deployment can be just as detrimental as no deployment at all.
Proper Handling of the Fish
The first rule of proper rockfish release, even before the descending device comes into play, is minimizing stress on the fish. This means reducing its time out of the water to an absolute minimum. As soon as you bring a rockfish aboard that you intend to release, get ready to deploy the descending device.
Handle the fish gently, ideally by supporting its belly and tail, or with a wet glove. Avoid squeezing it tightly or placing your fingers in its gills. If possible, keep the fish partially submerged while you're preparing the device and removing the hook. Quick unhooking is critical; single, barbless hooks can help with this. Once the hook is out, immediately attach the descending device. Every second out of water, especially on a warm or windy day, adds to the fish's stress and reduces its chances.
Step-by-Step Deployment
Let's walk through the actual process of using a descending device, focusing on a weighted clamp type, which is popular and user-friendly.
- Prepare Your Station: Before you even bring the fish in, have your descending device rigged, weighted, and the line coiled neatly (or on a spare reel) and ready for immediate deployment. You don't want to be fumbling around when the fish is on deck.
- Unhook Quickly and Carefully: Bring the rockfish aboard, and with minimal handling, remove your hook. If the fish is deeply hooked or bleeding heavily, a descending device may not be enough, and those fish often have a poor survival rate regardless. However, for fish with external barotrauma and a clean hook removal, proceed to the next step.
- Attach the Device Securely: Grip the fish gently. Open the clamp of your descending device and attach it firmly to the fish's lower jaw. Ensure it's secure enough that the fish won't wriggle free during descent, but not so tight that it causes further injury. The goal is to hold it firmly by the jaw, allowing its mouth to stay closed as it descends.
- Lower the Fish Swiftly: Hold the fish over the side of the boat, ensuring the weight and device are clear. Gently lower the fish into the water, allowing the weight to pull it down quickly. You want a rapid descent, so don't try to slow it down.
- Monitor the Line: Let the line spool out until it goes slack, or until you estimate the fish has reached the depth it was caught from. The deeper you send it, the better. Aim for at least 50-60 feet, or deeper if you know the fish came from 100+ feet.
- Release the Fish: Once you feel the line go slack or you've reached your target depth, give a sharp, firm tug on the descending device line. This action should disengage the clamp, freeing the fish. The fish, now recompressed, should swim away under its own power.
- Retrieve and Reset: Reel in your descending device, check it for any damage, and coil the line or re-spool it, ready for the next fish.
Remember, practice makes perfect. The more you use it, the more fluid and efficient you'll become, which directly benefits the fish.
Best Practices and Common Mistakes
Even with a descending device, there are ways to optimize your approach and pitfalls to avoid.
Best Practices:
- Be Prepared: Always have your descending device rigged and easily accessible before you start fishing deep water. Don't wait until you've caught a fish. This is part of What to Check Before Every Washington Fishing Trip.
- Minimize Air Exposure: Keep the fish out of the water for the shortest possible time. Think seconds, not minutes.
- Target Depth: Aim to return the fish to its original depth, or at least deep enough for the pressure change to reverse the barotrauma.
- Rapid Descent: The faster the fish gets back to depth, the better. Don't try to "ease" it down.
- Gentle Handling: Even though you're working quickly, handle the fish with care. Avoid touching its eyes or gills.
Common Mistakes to Avoid:
- Dropping the Fish: Never simply drop the fish back in the water without a device if it's suffering from barotrauma. It will just float, die, or be eaten.
- Insufficient Weight: Using too light a weight will result in a slow descent, which might not effectively recompress the swim bladder or may even prolong the fish's suffering.
- Improper Attachment: If the device isn't securely attached, the fish might escape halfway down, only to float back to the surface.
- Releasing Too Shallow: Releasing a fish at an insufficient depth means the barotrauma might not be fully reversed, and it could still struggle to survive.
- Delaying Deployment: Every moment a fish with barotrauma spends on the surface is detrimental. Act immediately.
- Using on Severely Injured Fish: If a fish is bleeding profusely from the gills, has suffered massive internal damage, or is clearly dead, a descending device won't help. In such cases, and if legal to retain, it may be more humane to keep it if it contributes to your bag limit. However, for species that must be released, such as specific types of rockfish, you're still obligated to try your best.
Legal Requirements and Conservation Efforts in Washington
Washington State is at the forefront of marine conservation, and that includes specific regulations aimed at protecting vulnerable species like rockfish. These aren't just suggestions; they're laws designed to ensure sustainable fishing practices.
When Descending Devices Are Required by Law
In Washington, the use of descending devices is often a mandatory requirement when fishing for bottomfish in certain marine areas or for specific species, particularly when fishing at depths greater than 30 fathoms (180 feet). While the specifics can change, the general rule is clear: if you are fishing for or possess rockfish, and you are fishing in an area or depth where rockfish are likely to suffer from barotrauma upon release, you must have a descending device on board and use it if you release a rockfish. This requirement is explicitly stated in the Washington Sport Fishing Regulations pamphlet.
This regulation exists precisely because rockfish populations have been impacted in the past, and proper release techniques are crucial for their recovery and long-term health. Ignoring these rules can lead to significant Fines and Penalties for Common Fishing Violations. Always consult the latest Washington Fishing Regulations Every Angler Should Know and the specific rules for the marine area you're fishing in to ensure compliance. Knowing Rockfish Species That Must Be Released in Washington is also part of this vital knowledge.
Impact on Rockfish Populations
The widespread adoption and mandatory use of descending devices are having a measurable positive impact on rockfish populations. Studies have shown that proper recompression dramatically increases the survival rate of released rockfish, often from near zero to upwards of 80-90% for fish that are otherwise healthy.
This means that every fish you successfully release with a descending device has a much higher chance of spawning and contributing to the next generation, rather than simply dying as bycatch. For species that have long lifespans and mature slowly, like many rockfish, every surviving individual counts. These conservation efforts, coupled with careful management of fishing seasons and bag limits, are vital components of a sustainable fishery. It's about ensuring that we can continue to enjoy fishing in Washington for years to come.
Beyond the Device: Other Conservation Tips
While descending devices are a powerful tool, they're just one part of a broader conservation ethic for bottomfish anglers. Here are a few other tips to help protect these valuable species:
- Know Your Target: Understand what fish you're likely to encounter in your chosen fishing spot. If you're consistently catching protected rockfish or species prone to barotrauma, consider moving to shallower water or targeting other species.
- Reduce Bycatch: Use appropriate gear and techniques designed to minimize catching non-target species. For example, if you're Bottom Fishing for Lingcod and Rockfish off Washington, using larger baits or lures can help deter smaller fish.
- Single, Barbless Hooks: Whenever possible, use single, barbless hooks. They are much easier to remove quickly and cause less damage to the fish.
- Respect Closed Areas and Seasons: Pay close attention to marine area closures and specific seasons for rockfish. These are put in place for a reason – to allow populations to recover or spawn undisturbed.
- Educate Others: Share your knowledge about descending devices and proper fish handling with fellow anglers. The more people who understand and practice responsible fishing, the better for our fisheries.
By combining the use of descending devices with these broader conservation practices, we can all contribute to the health and abundance of Washington's incredible marine life.
Comparing Descending Device Options
To help you choose the right descending device for your fishing style, here's a quick comparison of the common types:
| Feature | Weighted Clamp/Lip Gripper Devices | Inverted Hook Devices | Recompression Chamber Devices |
|---|---|---|---|
| Description | Heavy weight with a spring-loaded clamp that attaches to the fish's jaw/lip. Releases with a tug. | Heavy weight with a large, barbless inverted hook that punctures jaw/gill plate. Releases with a tug or fish movement. | Weighted cage or tube where fish is placed, lowered, and then released at depth. |
| Pros | Easy to use, secure attachment, clear visual confirmation of release. Good for most rockfish sizes. | Simple design, less mechanical parts, can be DIY. Good for various fish sizes. | Highest survival rates (controlled environment), protects fish from predators during descent. |
| Cons | Mechanical parts can fail, sometimes requires two hands to attach, potential for jaw injury if mishandled. | Requires careful hook placement, potential for puncture wounds, may be harder to confirm release. | Bulky, slower to deploy, more expensive, typically not practical for recreational anglers. |
| Best Use Case | General recreational bottom fishing, quick release of moderate-to-large rockfish. | Anglers preferring simpler gear, or DIY approach, targeting smaller to moderate-sized rockfish. | Scientific research, commercial operations prioritizing maximal survival, very delicate species. |
| Availability (Example) | Readily available on Amazon, tackle shops (e.g., SeaQualizer, various generic brands). | Can be purchased or easily constructed DIY, often found at specialty tackle shops. | Specialized equipment, not commonly available to general public. |
Remember, the best device is the one you will use consistently and correctly. Having one rigged and ready is far more important than debating the minute differences between models.
Disclaimer
This article is for general informational purposes only and does not constitute professional advice. Laws, prices and regulations vary by location and change over time. Consult a qualified professional for guidance on your specific situation.