How to Plunk for Salmon on a Washington River
It’s a common frustration for Washington anglers: standing on the bank of a big, fast-flowing river, watching salmon jump just out of reach, but your bait just won't stay put. The current is too strong, your tackle gets swept away, and you end up spending more time re-rigging than actually fishing. If you've been there, feeling defeated by the relentless river, this guide is for you. We're going to dive deep into "How to Plunk for Salmon on a Washington River," a tried-and-true method that lets you anchor your presentation right in the salmon’s travel lane, giving you a real shot at landing one of those powerful fish.
Understanding the Essence of Plunking for Salmon
When you hear "plunking" in the context of salmon fishing, it might sound a bit… well, simple. And in many ways, it is, but don't mistake simplicity for ineffectiveness. Plunking is a highly effective, often relaxing, way to target salmon, especially when you're limited to fishing from the riverbank in strong currents.
What Exactly is Plunking?
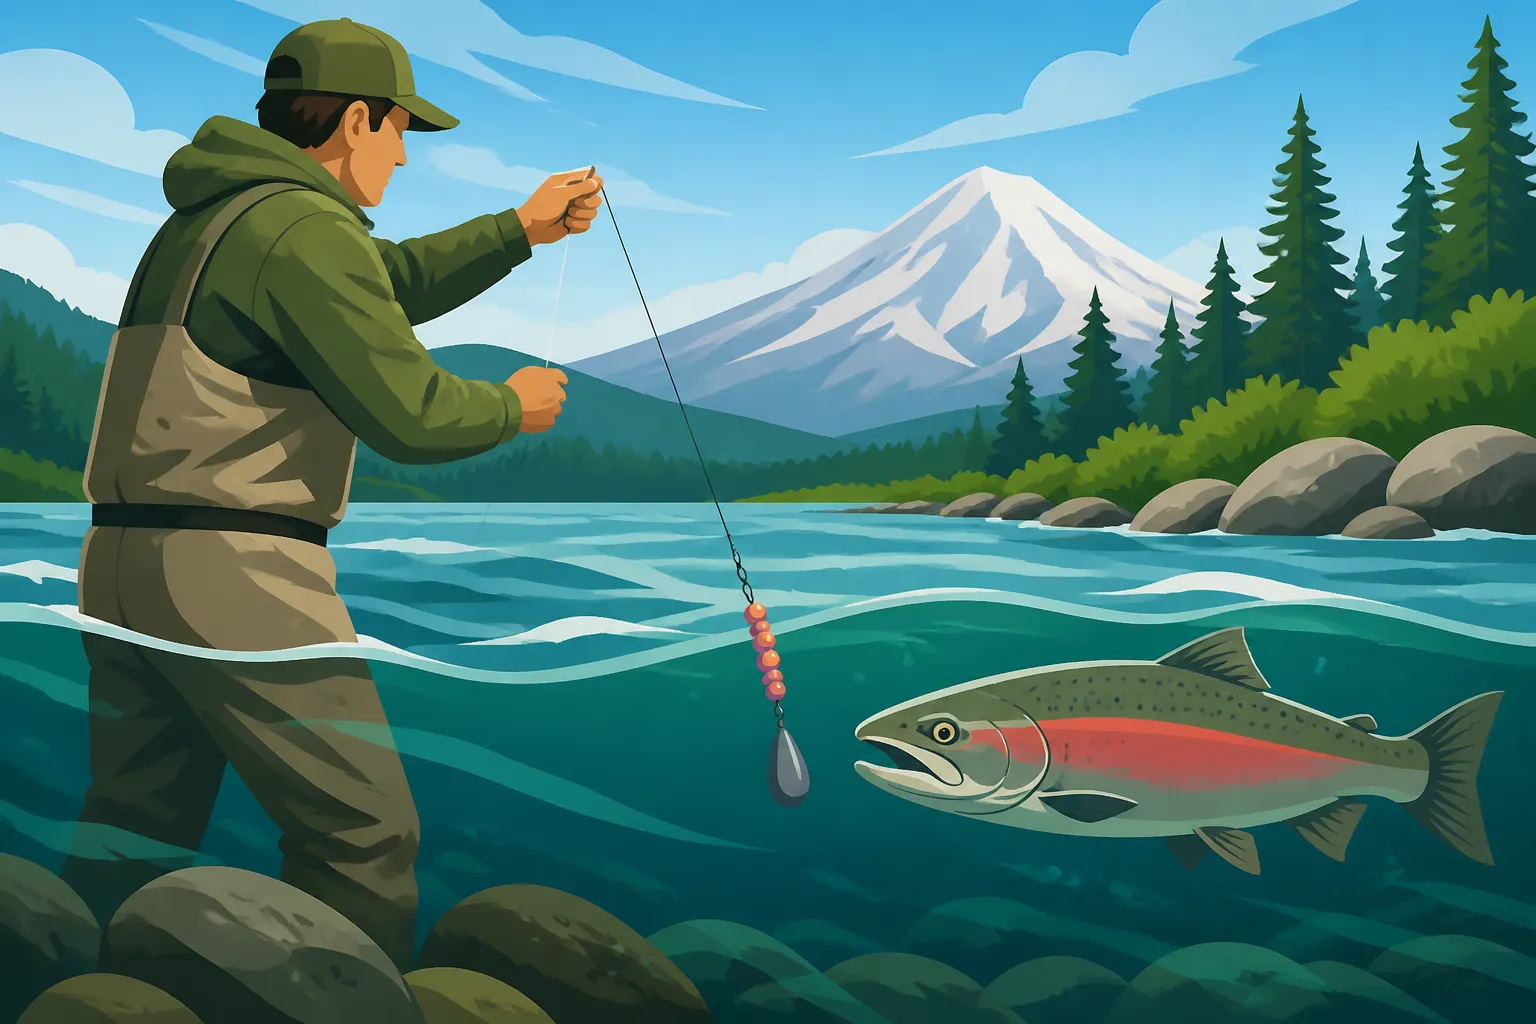
At its heart, plunking is a bank fishing technique where you use a heavy weight to anchor your bait or lure in a specific spot within a river's current. Instead of actively casting and retrieving or drift fishing with lighter weights, you cast your heavy rig out, let the weight settle to the bottom, and then simply wait for a salmon to find your offering. The current does most of the work, creating action on your lure or wafting the scent of your bait downstream, enticing any passing salmon.
Think of it like setting up a fishing station. You identify a likely salmon holding or travel lane, cast your rig, and let it sit. The heavy lead keeps your presentation stable, preventing it from being swept away by the powerful flow that would make traditional drift fishing impossible. This stationary approach is perfect for those big Washington rivers like the Columbia or the Cowlitz, where the sheer volume and speed of water can be overwhelming for other bank techniques. It's less about constant engagement and more about strategic placement and patience, letting the fish come to you.
Why Plunking is a Go-To for Bank Anglers
For many bank anglers, plunking isn't just a choice; it's often the best choice, especially when dealing with the realities of Washington's larger rivers. First off, accessibility is a huge factor. Not everyone has a drift boat or a power boat, and from the bank, your options can feel limited. Plunking opens up vast stretches of river that might otherwise be unfishable due to strong currents.
Beyond accessibility, plunking is surprisingly effective. Salmon, particularly those migrating upriver, often hug current seams or rest in eddies behind structure. By anchoring your bait in these key locations, you're placing it directly in their path, increasing your chances of a hookup. It also allows you to cover water more effectively in a static way. You can set multiple rods (if regulations allow and you have the appropriate endorsement, like a Washington's Two-Pole Endorsement and Who Needs One if fishing two poles) along a stretch of bank, each covering a slightly different lane or depth.
It's also a relatively low-stress method once you're set up. You're not constantly casting or mending line; you're often enjoying the river, observing nature, and waiting for that tell-tale tug. This makes it a fantastic option for family outings or for those who simply want a more relaxed fishing experience without sacrificing the chance at a trophy salmon. The biggest frustration often comes from not knowing where or how to set up, but once you master the technique, you'll find it incredibly rewarding.
Essential Gear for a Successful Plunking Setup
Before you even think about casting, having the right gear is paramount. Plunking is not a finesse technique; it demands robust equipment that can handle heavy weights, strong currents, and powerful, aggressive salmon. Trying to plunk with a lightweight trout rod is a recipe for disaster and lost tackle.
Rods, Reels, and Line: Building Your Foundation
Let's start with the backbone of your setup: the rod, reel, and line.
- Rods: You'll want a heavy-duty rod, typically in the 8.5 to 10.5-foot range, with a medium-heavy to heavy action. Some plunkers even go for longer, like 12-foot rods, especially when trying to cast across wide sections of the Columbia. The extra length helps with casting those heavy weights and providing leverage when fighting a strong fish in a current. Look for rods rated for 15-40 lb line and 2-10 oz (or even higher) lures. Brands like Lamiglas, Okuma, or Shimano offer excellent options that can withstand the abuse of heavy lead and powerful runs.
- Reels: For plunking, a durable, high-capacity reel is a must. Many prefer level-wind baitcasting reels, as they excel at handling heavy line and weights, and their drag systems are built for big fish. A reel in the 200-400 size class (e.g., an Ambassadeur 6500 or a Shimano Calcutta 400) would be appropriate. If you prefer spinning reels, opt for a large, heavy-duty model with a robust drag, like a Penn Battle III or a Shimano Spheros in a 6000-8000 size. The key is a strong drag that can handle sustained pressure and a retrieve ratio that allows you to bring in heavy lead without too much strain.
- Line: Your mainline should be a strong braided line, typically 30-65 lb test. Braid offers superior sensitivity, minimal stretch, and incredible strength for its diameter, which is crucial when detecting subtle bites with a heavy weight far out in the current. A brighter color braid can help you track your line in the water, especially in low light. You'll then tie a leader of monofilament or fluorocarbon (20-40 lb test) to your main braided line. Monofilament offers a bit more stretch and abrasion resistance, while fluorocarbon is nearly invisible in water and can be a good choice for clearer conditions. Make sure your leader is heavy enough to handle the fish but light enough to break if your lead gets hopelessly snagged, saving your main line.
Weights, Spreading Devices, and Terminal Tackle
This is where "plunking" gets its name, because you're literally plunking a heavy weight down.
- The "Plunking" Lead: This is the most critical component. You'll need substantial weight to hold bottom in strong currents. Pyramid sinkers are a popular choice due to their ability to dig into the riverbed. Flat sinkers can also work in less extreme currents, and Sputnik sinkers (with deployable wires) are excellent for sandy or muddy bottoms where you need maximum grip. The weight you choose will depend heavily on the river's current speed and depth. On a powerful river like the Columbia, it's not uncommon to use 8, 12, or even 16 ounces of lead. It's a good idea to have a range of weights on hand, as river conditions can change quickly. You can find a wide variety of these heavy sinkers on platforms like Amazon or at your local tackle shop.
- Spreader Bars or Slider Setups: To prevent your bait from twisting around your mainline or getting too close to your heavy weight, you'll need a spreading device.
- Spreader Bars: These are rigid wire arms that keep your weight and leader separated. The weight clips to one arm, and your leader (with bait) attaches to the other, ensuring your bait drifts freely a foot or two above the bottom.
- Fish Finder Rigs (Sliders): This setup involves a plastic or metal sleeve that slides freely on your mainline. Your heavy weight attaches to this slider, while a bead and swivel below the slider prevent it from reaching your leader. This allows the fish to pick up your bait without immediately feeling the resistance of the heavy weight, which can lead to more solid bites.
- Swivels, Beads, and Hooks: Use high-quality barrel or ball-bearing swivels (rated for at least 50 lb) to prevent line twist. Beads are often used in conjunction with sliders to protect knot integrity. For hooks, opt for strong, sharp, single hooks in sizes 2/0 to 5/0, depending on your bait. Circle hooks are also gaining popularity for their ability to set in the corner of a fish's mouth, reducing gut-hooking, which is particularly important for catch-and-release scenarios or wild fish. Always check Barbless Hook Requirements on Washington Rivers as many salmon and steelhead rivers require them.
Baits and Scents: What Attracts the Bite
Once your hardware is sorted, it's time to think about what will actually draw in those salmon.
- Cured Salmon Roe (Egg Bags): This is a classic and highly effective bait for salmon. Fresh, properly cured salmon eggs are irresistible to salmon. You can tie them into small "roe bags" using mesh netting, creating a scent trail that salmon follow. Learning How to Fish Roe Bags for Salmon effectively is a skill every plunker should develop. The key is to use fresh, brightly colored, and well-cured eggs.
- Scented Artificial Baits: When real bait isn't allowed or if you prefer a more durable option, scented artificial lures are excellent.
- Kwikfish/Wiggle Warts: These diving plugs have a strong wiggling action in the current, mimicking an injured baitfish. They come in various sizes and colors, and many anglers add scent to them for extra appeal.
- Spin-N-Glos/Aids: These spinning devices, often combined with a corky or a small Cheater-style plug, create a lot of flash and vibration in the current. While often associated with steelhead, understanding How to Fish a Spin-N-Glo for Steelhead is directly applicable to salmon, as they share similar preferences for these attractants.
- Adding Scent: Regardless of whether you're using natural bait or artificial lures, adding extra scent is always a good idea. Pro-Cure, Mike's, and Pautzke are popular brands offering various fish attractants like Anise, Krill, Garlic, or Sardine scents. Apply liberally and often, as the current will wash it away over time. A strong scent trail significantly increases your chances, especially in off-color water.
Mastering the Plunking Technique: From Setup to Strike
With your gear assembled, it's time to put it all into practice. Plunking isn't just about throwing a heavy weight; it's about strategic setup and understanding the river.
Setting Up Your Plunking Rig Step-by-Step
Let's walk through a common and highly effective plunking rig, often referred to as a "fish finder" rig or a "slider" setup, perfect for keeping your bait enticingly presented.
- Mainline to Swivel: Start by tying your braided mainline to a heavy-duty barrel swivel. A Palomar knot is excellent for braid due to its strength.
- Add the Slider: Thread your fish finder slide (the plastic or metal sleeve) onto your mainline above the swivel. Your heavy plunking weight will attach to this slider. The beauty of this is that when a fish takes the bait, your line pulls through the slider, allowing the fish to run without immediately feeling the resistance of the heavy weight. This usually results in a more confident bite.
- Bead for Protection: Slide a small plastic bead onto the mainline, positioning it between the slider and the barrel swivel. This bead protects the knot on your barrel swivel from being constantly hammered by the slider and lead during casting and in the current.
- Leader Connection: To the other eye of the barrel swivel, tie your monofilament or fluorocarbon leader. The length of your leader is crucial; it should be long enough to allow your bait to flutter naturally in the current, typically 2 to 4 feet. Experiment with leader length based on current speed and water clarity. A longer leader might be better in very clear, slow water, while a shorter one works in fast, turbid conditions.
- Hook and Bait: At the end of your leader, tie on your hook (e.g., a 3/0 or 4/0 octopus hook) and attach your chosen bait, whether it’s a plump roe bag, a scented Kwikfish, or a Spin-N-Glo with an added chunk of prawn.
Remember, the question of Do You Need a Sinker for Bank Fishing the Columbia? is definitively answered with a resounding "yes" when it comes to plunking! And not just any sinker, but a heavy one.
Identifying Prime Plunking Locations
This is arguably the most critical aspect of successful plunking. You can have the perfect rig, but if you're not in the right spot, you won't catch fish. Salmon don't just swim randomly; they follow specific travel lanes and rest in particular areas.
- Current Seams: Look for areas where fast current meets slower water. Salmon often hold or travel along these seams, conserving energy. A prime plunking spot is just on the edge of the slower water, allowing your bait to be tantalizingly swept into the faster lane.
- Eddies: These are pockets of slower, swirling water, often found behind large rocks, fallen trees, or points of land. Salmon love to rest in eddies before making another push upstream. Casting into or just at the entrance of an eddy can be incredibly productive.
- Deeper Holes and Depressions: Use your knowledge of the river or even a simple depth finder (if accessible from shore, or by observing other anglers and boat traffic) to locate deeper sections of the riverbed. Salmon prefer deeper, cooler water, especially during warmer parts of the day or lower light.
- Pinch Points/Chokepoints: Areas where the river narrows or flows through a constricted channel often force salmon into a more concentrated travel path. These can be fantastic plunking spots, as more fish are funneled through a smaller area.
- Structure: Any natural or man-made structure in the river – large boulders, log jams (beware of snags!), bridge pilings – can create current breaks and holding water for salmon.
- Observation: One of the best ways to find prime spots is simply to observe. Watch where other successful anglers are fishing, look for jumping or rolling salmon, and pay attention to the contours of the riverbank. When fishing a major waterway like The Columbia River in Washington: A Complete Overview, these visual cues are invaluable.
The Cast, the Wait, and the Hookset
Once you've identified your spot and rigged up, it's time for the action (or rather, the patient waiting).
- The Cast: With such heavy weights, your cast needs to be controlled and deliberate. Use a smooth, overhead motion, aiming slightly upstream and across the current from your desired holding spot. Allow the weight to arc out and land gently. Avoid violent, jerky casts that can lead to tangles or even snapping off your heavy lead.
- Letting It Settle: As your weight hits the water, let it sink unimpeded until you feel it hit the riverbed. Then, gently take up any slack in your line, creating just enough tension to feel the weight digging into the bottom. Your rod tip should have a slight bend, indicating your line is tight to the weight.
- The Wait: Now, you wait. This is where patience truly comes into play. Set your rod in a sturdy rod holder (essential for plunking!) and engage your reel's clicker or set the drag lightly enough to allow line to peel off if a fish makes a hard run. Watch your rod tip intently. A salmon bite can range from a subtle tap-tap to a violent thwack that nearly pulls your rod out of the holder. Don't be too quick to react to every little bump; sometimes it's just debris or the current moving your weight slightly.
- The Hookset: When you get a solid bite – a sustained pull or a hard, deliberate thud – don't hesitate. Grab your rod, point the tip towards the fish, reel down until you feel direct contact, and then lean into a strong, sweeping hookset. Really drive that hook home, as salmon have tough mouths. If using circle hooks, simply apply steady pressure; the hook will set itself as the fish swims away. Once the hook is set, keep constant pressure on the fish, using your reel's drag and the leverage of your heavy rod to fight it out of the current. It's an exhilarating battle!
Strategic Considerations and Local Knowledge
Plunking isn't a one-size-fits-all technique. To truly master it, you need to think strategically and incorporate local knowledge about Washington's diverse rivers and their specific fisheries.
Timing Your Plunking Trips
Success in salmon fishing often comes down to timing. Knowing when and where the fish are can make all the difference.
- Peak Salmon Runs: Different salmon species have different run timings throughout the year. For instance, you might be targeting Chinook (Kings) in late summer and early fall, then switching to Coho (Silvers) a bit later, and then Chum (Dog Salmon) or even Steelhead (an ocean-run rainbow trout, though often caught on salmon gear) as winter approaches. Understanding When Chinook Salmon Run in Washington's Puget Sound or the timing for other species on different rivers is crucial. Consult the Washington Department of Fish and Wildlife (WDFW) fishing pamphlet or their website for specific run timings for your target river.
- Tides (for tidally influenced rivers): On rivers influenced by the tide, such as the lower Columbia River or the lower reaches of rivers that flow into Puget Sound, tidal movement plays a huge role. Often, an incoming tide can push fresh fish into the river system, making the first few hours of the flood tide or the slack tide particularly productive. Conversely, an outgoing tide can sometimes concentrate fish in certain areas. Observing the daily tide charts is just as important as checking the Washington Fishing Seasons: A Month-by-Month Guide.
- Water Conditions: River flow, clarity, and temperature all impact salmon behavior. High, turbid water after heavy rains might require heavier weights and more scent, as fish are less likely to see your offering. Conversely, low, clear water might call for lighter leaders and more subtle presentations. Keep an eye on river gauges and local reports to get an idea of current conditions. Extreme temperatures can also make fish lethargic.
Adapting to Different Washington Rivers
Washington is blessed with an incredible variety of salmon rivers, each with its own character and rules. While the core principle of plunking remains the same, your approach might need to change.
- Columbia River: This massive waterway often demands the heaviest weights and longest casts. Plunking the Columbia can be incredibly productive for fall Chinook and Coho. Pay close attention to current breaks created by islands, bridge pilings, or large gravel bars.
- Cowlitz River: Known for its strong runs of spring Chinook, summer steelhead, and fall salmon, the Cowlitz has numerous accessible bank fishing spots. The current here can still be quite strong, requiring solid weights, but perhaps not as heavy as the mainstem Columbia.
- Kalama River: Another popular salmon and steelhead river, the Kalama is smaller than the Cowlitz but still offers plenty of plunking opportunities, especially in its lower stretches.
- Skagit River (when open): While often known for its wild steelhead and strict regulations, when sections of the Skagit are open for salmon, plunking can be a method used. However, always double-check the latest WDFW regulations meticulously, as the Skagit has very complex and often restrictive rules regarding gear and retention.
- Regulations, Regulations, Regulations: This cannot be stressed enough. Each river, and sometimes even different sections of the same river, will have specific rules regarding open seasons, gear restrictions (e.g., barbless hooks only, bait bans), bag limits, and even release requirements for wild fish. You must always consult the current Reading the Washington Sport Fishing Regulations Pamphlet and check for any emergency rule changes before you head out. Failing to do so can result in hefty fines and even loss of fishing privileges. Remember, ignorance of the law is not an excuse!
Safety and Etiquette for Bank Anglers
Beyond the fishing technique itself, responsible angling includes prioritizing safety and showing respect for the environment and fellow anglers.
- Personal Flotation Devices (PFDs): If you're fishing near deep, fast-moving water, especially in colder months, wearing a PFD is a wise decision. Accidents can happen quickly, and the cold water of Washington rivers can be deadly.
- Bank Stability: Riverbanks can be unstable, especially after heavy rains or during periods of high flow. Be mindful of slippery mud, loose rocks, and undercut banks that could collapse.
- Weather Awareness: Washington weather is famously unpredictable. Bring appropriate rain gear, dress in layers, and be prepared for sudden changes.
- Leave No Trace: Always pack out everything you pack in, and if you see litter, consider picking it up. Keeping our rivers clean ensures they remain beautiful and productive for everyone.
- Respect Other Anglers: Plunking often means finding a good spot and staying there. Be mindful of casting distances and avoid crowding other anglers. Give people space. If you're using multiple rods, ensure you're not interfering with others' ability to fish. Knowing and following Washington Fishing Regulations Every Angler Should Know also includes understanding ethical angling practices.
- Handle Fish Responsibly: If you're releasing fish, do so quickly and carefully. Minimize their time out of the water, support their body, and allow them to recover in the current before letting them go.
| Weight Type | Common Sizes (oz) | River Conditions Best For | Pros | Cons |
|---|---|---|---|---|
| Pyramid Sinker | 3-10 | Moderate to fast current, rocky bottom | Excellent grip, less roll; anchors well | Can snag easily in heavy cover; difficult to retrieve from snags |
| Flat Sinker | 2-8 | Slower currents, sandy/gravel bottom | Minimal roll, good feel for bites; less likely to snag in open areas | Less grip in heavy current; can get swept downstream more easily |
| Sputnik Sinker | 4-12 | Very strong current, sandy/mud bottom | Exceptional grip with deployable wires; holds firm in intense flow | Bulky; wires can bend; more expensive than traditional sinkers |
| Cannonball/Egg Sinker | 1-6 | Light current, slower sections; better for drift than pure plunking | Rolls naturally along bottom; less snagging in some areas | Poor grip for true plunking in strong current; will get swept away |
Disclaimer
Please remember that fishing regulations in Washington State can change frequently, often with little notice, due to emergency rule changes by the WDFW. Always consult the most current official WDFW regulations pamphlet and check their website for emergency rule updates before heading out on any fishing trip. The information provided here is for general guidance only.