Pacific Halibut Fishing on the Washington Coast
For many anglers, the Washington coast represents the pinnacle of saltwater fishing, but nothing quite compares to the thrill and challenge of pursuing Pacific halibut. This isn't your everyday trout trip; halibut fishing offshore can be intimidating, demanding specific gear, techniques, and a deep understanding of ever-changing regulations. If you've ever felt overwhelmed by where to start, what to use, or how to navigate the season, this guide is designed to demystify the process and equip you with the knowledge to confidently target these magnificent flatfish.
Understanding the Elusive Pacific Halibut on Washington's Coast
The Pacific halibut is more than just a large flatfish; it's an icon of the Pacific Northwest and a highly sought-after prize for anglers. Known for their formidable fight, impressive size, and exquisite table fare, landing a halibut is often a bucket-list item. However, their elusive nature and the specific conditions required to target them make the pursuit a true adventure.
What Makes Halibut Such a Prized Catch?
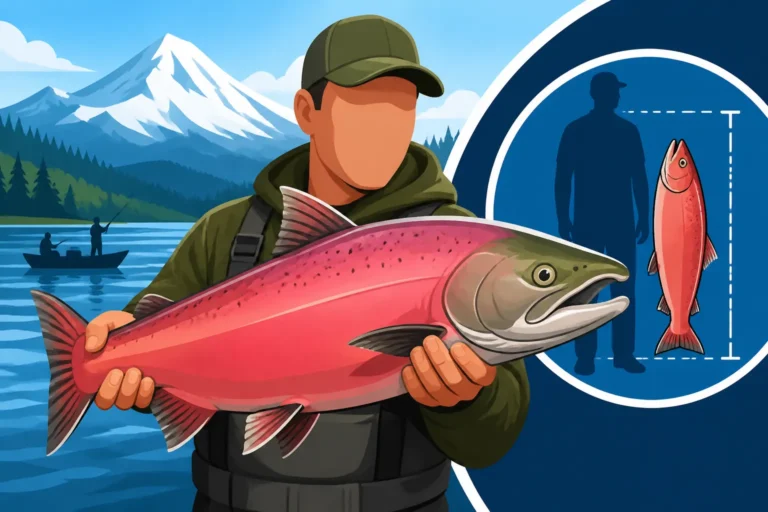
Halibut stand out for several reasons. First and foremost, their size potential is legendary. While the average Washington halibut might be in the 20-50 pound range, "barn doors" exceeding 100 pounds are caught regularly, and true giants pushing past 200 pounds are not unheard of. Imagine reeling in a fish that's as big as you are – it's an experience that leaves an indelible mark. Beyond their fighting prowess, halibut offer some of the finest eating in the ocean. Their firm, white, flaky meat is incredibly versatile, lending itself to grilling, baking, frying, or even smoking. The demand for halibut is always high, both commercially and recreationally, which also contributes to the stringent regulations and limited seasons. For many, a successful halibut trip means a freezer full of delicious, healthy protein for months.
The challenge of the hunt itself also adds to their allure. Halibut often reside in deep, often turbulent waters, requiring specialized heavy tackle and a willingness to brave offshore conditions. It's a game of strategy, patience, and adapting to the ocean's moods. Anglers who consistently catch halibut are often those who've put in their time, learned the nuances of the local waters, and respect the power of these incredible fish. There's a certain satisfaction that comes from mastering such a demanding fishery.
Pacific Halibut Identification and Size in Washington
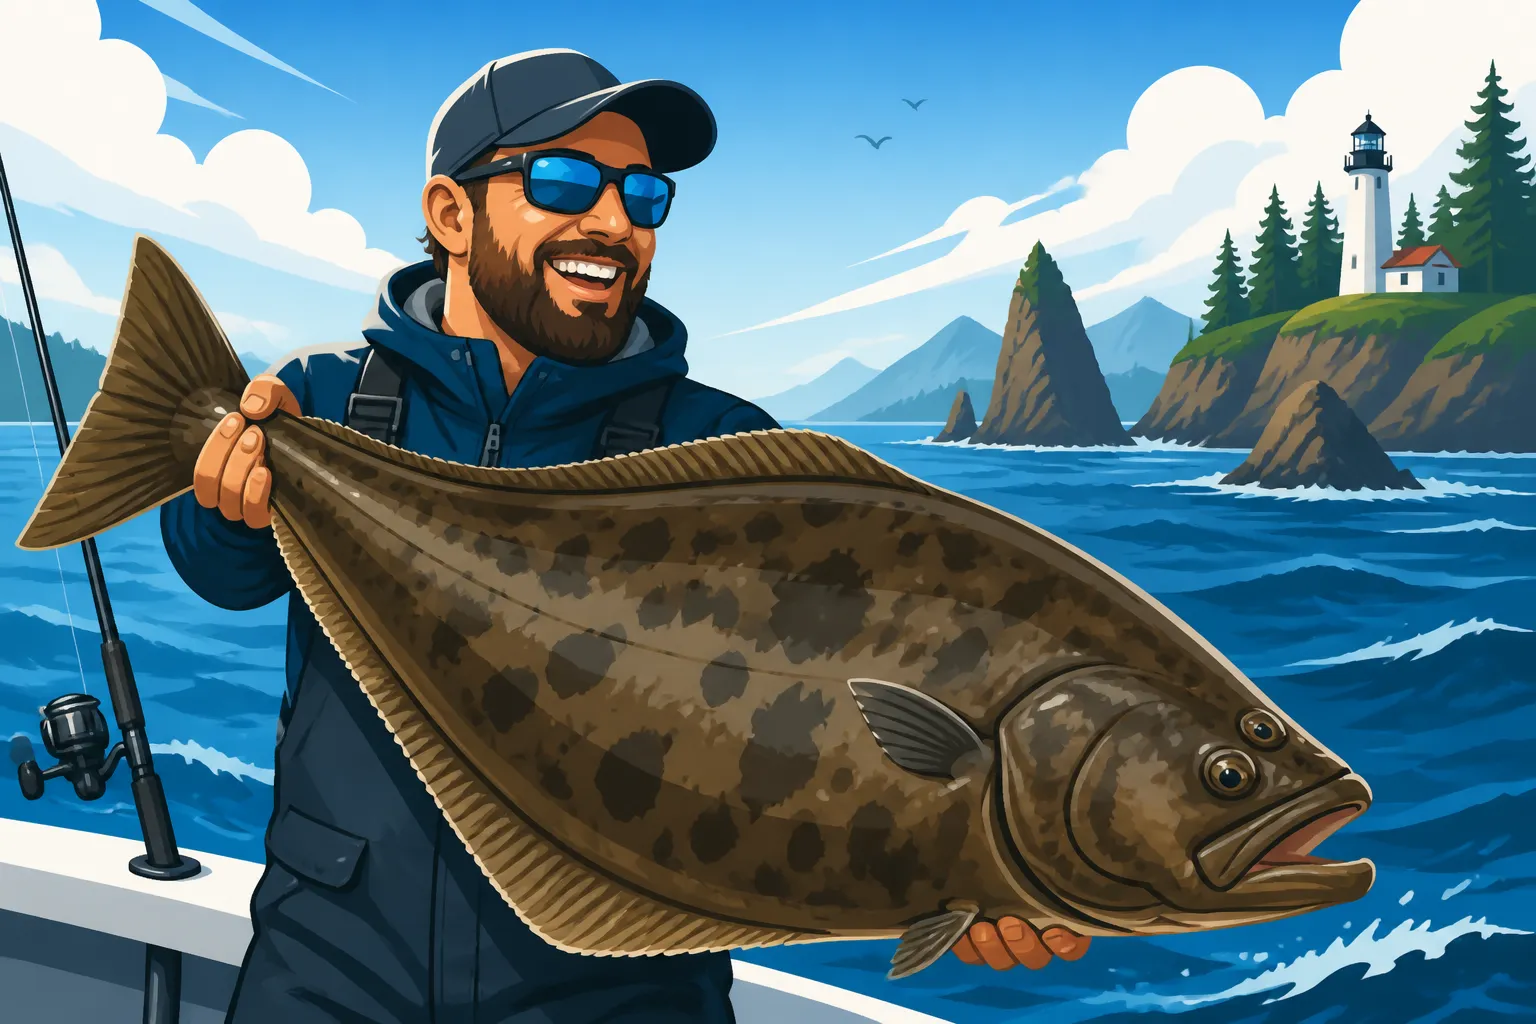
Identifying a Pacific halibut is generally straightforward once you've seen one. They are large, diamond-shaped flatfish with both eyes on their upper side (usually the right side, but sometimes the left). Their coloration typically provides excellent camouflage against the seafloor, ranging from dark brown to greenish-brown on their eyed side, with a much lighter, often white, blind side. A distinctive feature is their relatively small mouth with sharp, conical teeth. If you're unsure, you can also look for a strong, crescent-shaped tail. For a deeper dive into their physical traits, you might want to read our article on Pacific Halibut Identification and Size in Washington.
When it comes to size, the Pacific halibut can grow truly enormous. While younger fish, often called "chicken halibut," might be under 20 pounds, mature halibut can easily reach lengths of several feet and weights well over 100 pounds. The current state record for Washington is a testament to this, showing the immense potential in our waters. Understanding that there are slot limits and minimum/maximum size restrictions in place is crucial for retention, as smaller or excessively large fish may need to be released depending on the specific regulations for the season. Always check the current WDFW rules for the exact parameters.
The Halibut's Preferred Habitat and Behavior
Pacific halibut are bottom-dwelling predators, preferring sandy or gravelly bottoms at depths ranging from 50 to over 1,000 feet, though most recreational fishing occurs in shallower waters up to a few hundred feet deep. They are ambush predators, lying in wait on the seabed, camouflaged, until an unsuspecting meal swims by. Their diet is varied, including cod, pollock, rockfish, sole, crab, octopus, and even other halibut. They're opportunistic feeders, which means they'll strike at a wide range of baits and artificial lures.
Their behavior is heavily influenced by factors like currents, tides, and the availability of food. During strong current changes, halibut often move to areas where baitfish are concentrated or where they can more easily ambush prey without expending too much energy fighting the current. They also tend to congregate in specific areas, often around underwater structures, pinnacles, or drop-offs where food might accumulate. Understanding these patterns is key to locating productive halibut grounds, which is often learned through experience, local knowledge, or by carefully studying bathymetric charts before your trip.
Where to Hunt for Halibut: Key Fishing Grounds
Washington's long coastline offers several fantastic areas to target Pacific halibut, each with its own character and challenges. Knowing these areas and their nuances can significantly increase your chances of success. It's not just about getting offshore; it's about getting to the right offshore.
Nearshore vs. Offshore Halibut Grounds
When we talk about halibut fishing in Washington, it often breaks down into two main categories: nearshore and offshore. Nearshore halibut typically refers to fishing in waters closer to the coast, often within a few miles of the surf line or in shallower sections of the continental shelf. These areas are generally more accessible to smaller boats and can offer good fishing, especially early in the season or during specific tidal movements. Examples might include areas just outside Grays Harbor or off the mouth of the Columbia River. The fish here can still be sizable, but the truly massive "barn doors" are often found further out.
Offshore halibut grounds, on the other hand, are located much further out, sometimes 20, 30, or even 50 miles from shore. These are deep-water territories, often on the outer continental shelf or around prominent underwater structures that act as aggregators for bait and, consequently, for halibut. Fishing these areas requires larger, more capable vessels, a solid understanding of offshore navigation, and a keen eye on marine weather forecasts. While the travel time and fuel costs are higher, the rewards can be substantial, with a greater chance of encountering larger fish and potentially more consistent action. Popular offshore areas include those accessible from Westport and Ilwaco.
Popular Washington Coastal Halibut Marine Areas
The Washington Department of Fish and Wildlife (WDFW) divides the coast into specific marine areas, each with its own regulations and, often, its own halibut season dates and quotas. Understanding these areas is paramount. For example, Marine Area 1 (Ilwaco) covers the waters off the mouth of the Columbia River up to Leadbetter Point. Marine Area 2 (Westport) stretches from Leadbetter Point to the Queets River. Further north, you have Marine Area 3 (La Push) and Marine Area 4 (Neah Bay/Ozette). Each of these areas can have different opening dates, retention limits, and even depth restrictions depending on the year. It’s absolutely critical to consult the most current WDFW regulations pamphlet before every trip to ensure you're fishing legally.
Westport is often considered a prime launch point for halibut anglers due to its proximity to productive grounds and a robust charter fleet. Many anglers head out from Westport to offshore banks or specific pinnacles known for holding fish. Ilwaco, at the mouth of the Columbia River, also provides excellent access, particularly for anglers looking to combine a halibut trip with salmon or tuna fishing later in the season. Further north, La Push and Neah Bay offer access to pristine, often rugged, fishing grounds, though these can be more challenging to access and fish due to their remote nature and typically rougher ocean conditions.
Exploring Less-Fished Halibut Spots
While the main marine areas are well-known, smart anglers are always looking for those less-pressured spots. This often means studying nautical charts for subtle depth changes, underwater contours, and isolated pinnacles that might hold bait and, consequently, halibut. These "secret spots" aren't usually found through public forums but are discovered through years of personal exploration, trial and error, or by networking with experienced local anglers who are willing to share a few hints. Sometimes it's as simple as moving a mile or two from the main fleet to an area that looks promising on the chart, but no one else is fishing.
One strategy is to look for areas with hard bottom or mixed rock and sand near drop-offs. While halibut prefer soft bottoms for camouflage, they often cruise the edges of structure where baitfish hide. Another approach is to experiment with different depths during the season. Sometimes, as the season progresses, halibut may move into deeper or shallower water depending on food availability or ocean temperatures. Being willing to explore beyond the obvious spots can lead to truly memorable catches and a sense of accomplishment that goes beyond just the fish in the cooler. It's about becoming a more complete and observant angler.
Timing Your Trip: Seasons, Weather, and Tides
Successfully catching halibut on the Washington coast isn't just about showing up with the right gear; it's heavily dependent on timing. The ocean is a dynamic environment, and understanding the nuances of seasons, weather, and tides is paramount for both safety and success.
When Washington's Halibut Season Opens
This is probably the most critical piece of information for any aspiring halibut angler: the season is very short and very specific. Unlike some fisheries that are open for months, Washington's recreational halibut season is managed with extreme care to prevent overfishing and to allocate the limited quota fairly. The season typically consists of a few specific days, often Thursdays and Saturdays in May, June, and sometimes early July. These dates are announced by the WDFW well in advance, usually in late winter or early spring, after stock assessments and quota allocations are finalized. You can find up-to-date information by checking the WDFW website or calling their hotline. For more information, you can always consult resources like When Washington's Halibut Season Opens.
The opening dates can also vary by marine area. For example, Marine Areas 1 and 2 often have different open days than Marine Areas 3 and 4, or they might have different depth restrictions. It's not uncommon for the season to open with a flurry of activity, only to close quickly if the quota is met. This means you often have a very limited window to plan your trip, so flexibility is key. Many anglers will book their charters or block out their personal fishing days as soon as the dates are announced to ensure they don't miss out.
Understanding the Limited Halibut Fishing Days in Washington
The restrictive nature of Washington's halibut season means that every open day is a precious commodity. The total recreational harvest is capped by a quota, and once that quota is projected to be met, the season is immediately closed. This can sometimes lead to very short seasons, with only a handful of days available in total for the entire coast. For details on how many days are typically available, you can check guides like How Many Halibut Fishing Days Washington Gets.
This "derby" style fishing means that if you plan to fish a specific day, you really need to be prepared. Boats are often lined up at the launch ramps before dawn, and prime fishing spots can get crowded. However, this also contributes to the excitement; there's a collective energy among anglers who know they're participating in a unique and challenging fishery. Because of these limitations, many anglers opt to go with experienced charter operators who know the grounds and can maximize their chances during the short window.
The Critical Role of Weather and Tides
Of course, a planned open day means nothing if the weather doesn't cooperate. Offshore halibut fishing is heavily dependent on calm seas. A strong wind (anything above 10-15 knots) or a significant swell can make fishing unsafe, uncomfortable, or simply impossible. Waves that are 5 feet or higher are often a deal-breaker for most recreational boats, even larger ones. Always check multiple marine weather forecasts before heading out, and be prepared to cancel or reschedule if conditions are not favorable. No fish is worth risking your safety.
Tides also play a crucial role, especially for currents. Halibut fishing is often most effective during slower tidal exchanges – the periods just before and after slack tide. During strong currents, your bait or jig can be swept away rapidly, making it difficult to keep it on the bottom where the halibut are. High current also increases the amount of weight you need to use, which can make fishing less enjoyable and more prone to snags. Many successful halibut anglers plan their trips to coincide with slack tide windows, maximizing their time with a bait effectively presented on the seabed.
Gearing Up for Success: Rods, Reels, and Tackle
Pacific halibut are strong, heavy-bodied fish that live in deep water and fight with immense power. Trying to land one with inadequate gear is a recipe for frustration and lost fish. Investing in the right equipment is crucial for both success and a more enjoyable experience.
Heavy-Duty Rods and Reels for Halibut
For halibut, you need gear that can withstand serious abuse. A heavy-duty, conventional rod rated for 50-100 pound test line is typically recommended. These rods are usually shorter, between 5'6" and 7 feet, with a strong backbone to lift heavy weights from deep water and enough sensitivity in the tip to detect subtle bites. Look for rods with durable guides and reel seats that can handle the strain of heavy braid and a fighting fish. Brands like Penn, Shimano, and Daiwa all offer excellent conventional rods suitable for this kind of fishing.
Matching that rod with a robust conventional reel is equally important. Lever drag reels or star drag reels with a high line capacity (at least 300-500 yards of heavy braided line) and a powerful drag system are essential. Gear ratios around 4:1 to 5:1 are common, offering a good balance of cranking power and retrieval speed. A quality reel will have smooth, consistent drag that won't seize up under pressure. Think of models like the Penn Fathom or Senator series, or comparable offerings from Avet or Accurate. These are investments, but they'll last for years and won't let you down when that monster halibut decides to run. You can find a great selection of these on Amazon if you prefer to shop online.
Essential Lines, Leaders, and Terminal Tackle
When it comes to line, braided mainline is the overwhelming choice for halibut fishing. Its thin diameter relative to its breaking strength means less drag in the water, allowing you to use less weight to reach the bottom. 65 to 100-pound test braided line is common. The lack of stretch in braid also provides superior sensitivity, helping you feel even the softest bites in deep water. After the mainline, you'll want to tie on a heavy monofilament or fluorocarbon leader, typically 80 to 150-pound test, about 6-10 feet long. This leader provides abrasion resistance against the halibut's rough mouth and the seafloor.
Terminal tackle includes heavy-duty swivels, sinker slides, and circle hooks. Circle hooks, in sizes 16/0 to 20/0, are highly recommended and often required by regulation. They are designed to hook fish in the corner of the mouth, reducing gut-hooking and improving survival rates for released fish. Swivels should be rated for at least 200 pounds, and snap swivels for attaching your weights need to be equally strong. Weights, often called "cannonballs" or "lead bars," can range from 16 ounces to several pounds (2-5 lbs is not uncommon), depending on the depth and current. It's a good idea to have a variety of weights onboard, as conditions can change rapidly.
Baits and Jigs That Entice Halibut
Halibut are not particularly picky eaters, but some baits and lures definitely outperform others. Fresh, oily baits are usually the most effective. Herring, mackerel, salmon heads, and octopus are all excellent choices. You can present these on a circle hook, often with a large chunk of bait. Another popular option is a "salmon belly strip," which is a long, narrow strip of salmon belly meat that has excellent scent and durability. Combining bait with an artificial lure, like a large skirt or a scented plastic grub, can also increase attraction.
When it comes to artificial lures, large lead jigs are a staple. These can be anything from 8 to 24 ounces or more, often adorned with a large treble hook or a single assist hook. Colors like white, glow-in-the-dark, chartreuse, or natural baitfish patterns are popular. Large swimbaits or grub-tail plastics rigged on heavy jig heads are also effective. Some anglers even use scent attractants on their artificial lures to mimic baitfish more effectively. The key is to get your lure or bait on the bottom and keep it there, giving it some action to draw attention.
Here's a quick comparison of common halibut baits and jigs:
| Bait/Jig Type | Description | Pros | Cons |
|---|---|---|---|
| Herring (fresh) | Oily baitfish, often used whole or in large chunks. | Strong scent trail, natural presentation. | Soft, can be easily stolen by smaller fish. |
| Mackerel (fresh) | Another oily baitfish, tougher than herring. | Excellent scent, more durable than herring. | Can be harder to source fresh. |
| Octopus (cut) | Tough, white meat, often cut into strips. | Very durable, stays on hook well, halibut love it. | Can be expensive, less scent than oily fish. |
| Salmon Carcass | Heads, tails, or belly strips from salmon. | Excellent scent, often readily available after salmon season. | Can be messy, varying durability. |
| Lead Jigs | Heavy metal lures, often with skirts or reflective tape. | Active presentation, durable, good for attracting strikes. | Requires constant jigging, no natural scent on its own. |
| Soft Plastics | Large grub tails or swimbaits on heavy jig heads. | Mimics baitfish, versatile, can be scented. | Less natural scent than bait, can get torn. |
Mastering Halibut Fishing Techniques
Catching Pacific halibut isn't just about dropping a line to the bottom and waiting. While patience is certainly a virtue, understanding and executing effective fishing techniques will dramatically increase your chances of success.
Anchoring and Drifting for Halibut
There are two primary methods for presenting your bait or lure to halibut: anchoring and drifting. Both have their advantages and ideal conditions. For a more detailed look into these techniques, consult Anchoring and Drifting for Halibut.
Anchoring: This method involves dropping anchor and holding your boat stationary over a known halibut spot, a promising piece of structure, or a deep-water flat.
- Pros: Allows you to precisely target a specific area where you've marked fish or know they tend to congregate. You can set up multiple lines without tangling, and it's often more comfortable for anglers, especially in mild seas. Once you find a productive spot, you can milk it for sustained action.
- Cons: Can be difficult to anchor effectively in very deep water or strong currents, requiring a lot of anchor line and a robust anchor system. If the fish aren't precisely where you anchored, you might sit for a long time without a bite. Resetting an anchor can be a lot of work.
- When to Use: Ideal for calmer days, when you've pinpointed a specific piece of structure (like a pinnacle or wreck) or a feeding lane, or when fishing in areas with moderate currents where you want to keep your bait stationary.
Drifting: This technique involves allowing your boat to move naturally with the current and/or wind, covering a larger area and prospecting for fish.
- Pros: Covers a lot of ground, increasing your chances of finding scattered halibut. Less physically demanding than anchoring and resetting. Allows you to "troll" your bait or jig over a wider swath of seafloor.
- Cons: Can be challenging to keep your line on the bottom in strong drifts, requiring heavier weights. Multiple lines can tangle easily if not managed carefully. Your boat's speed and direction are at the mercy of the elements, making precision difficult.
- When to Use: Excellent for prospecting new areas, when halibut are scattered, during light to moderate currents, or when the wind is favorable for a slow, controlled drift. Some anglers use a sea anchor or drift sock to slow down their drift in windier conditions.
Effective Jigging Strategies for Halibut
Jigging is an incredibly effective technique for halibut, especially when they are actively feeding. It involves lowering a heavy jig to the bottom and imparting an enticing action that mimics a wounded baitfish or squid. The key is to keep your jig near the bottom, as halibut rarely swim far off the seabed to strike.
- The "Lift and Drop": This is the most common jigging motion. Let your jig hit the bottom, then lift your rod tip sharply 2-5 feet, allowing the jig to flutter back down. It's crucial to feel the jig hit the bottom each time to ensure you're in the strike zone. Halibut often hit the jig on the drop, so be ready for a strike as it falls.
- "Bouncing the Bottom": A more subtle approach, where you keep the jig just kissing the bottom, occasionally lifting it a foot or two before letting it settle back down. This mimics a bottom-feeding creature. This technique works well with jigs tipped with a strip of bait for added scent and appeal.
- "Power Jigging": For more aggressive fish, or when trying to attract attention from a distance, some anglers use a more vigorous jigging motion, lifting the rod tip higher and dropping it faster. This can create more flash and disturbance, but it also increases the chance of tangles if there are multiple lines in the water.
Regardless of the specific motion, pay close attention to your rod tip. Halibut bites can range from a subtle "thump" or extra weight to a rod-bending, line-stripping strike. If you feel anything unusual, set the hook! And remember, jigs can be found in a wide variety of weights and colors, often with glow-in-the-dark properties for deep water. Many anglers swear by the effectiveness of a large, heavy jig tipped with a piece of herring or octopus.
Choosing and Rigging the Best Baits
While jigs are great for active fish, bait often shines when halibut are a bit lethargic or when you want to maximize scent in the water. The correct rigging can make all the difference.
- Whole Herring or Mackerel: These are often rigged using a tandem hook setup, with one hook through the head and another near the tail, ensuring a good hook-up ratio. A large leader (100-150 lb test) is essential. Some anglers will "slash" the sides of the bait to release more scent.
- Octopus: Cut into strips or chunks, octopus meat is durable and a proven halibut producer. It's often threaded onto a large circle hook, ensuring the hook point is exposed. Many will combine an octopus chunk with a small piece of oily fish for a scent/durability combo.
- Salmon Belly Strips: These are cut from the firm, oily belly section of a salmon. They are incredibly tough, have great natural oil, and flutter enticingly in the current. Rig them on a large circle hook so they can spin or wave freely. You can purchase these or cut them yourself from a fresh salmon.
When rigging bait, always ensure your circle hook is exposed and not buried in the bait. This allows the hook to do its job as the fish takes the bait and swims away. Using a large, scent-dispersing attractant like a large plastic squid skirt above your bait can also help draw attention in the deep, dark waters where halibut reside. Remember that the goal is to get your bait down, keep it on the bottom, and let its natural scent and appearance do the work. Don't be afraid to try different baits throughout the day; what they wanted in the morning might change by the afternoon.
Navigating Washington's Halibut Regulations
Fishing for Pacific halibut in Washington is a highly regulated activity, and for good reason: to ensure the sustainability of this valuable resource. Ignorance of the rules is never an excuse, and violations can result in hefty fines and loss of fishing privileges. It's essential to be thoroughly familiar with the current regulations before you ever leave the dock. You can find comprehensive details in our Washington Fishing Regulations Every Angler Should Know guide.
Washington Fishing License Guide for Nonresidents and Residents
First and foremost, everyone fishing for halibut in Washington, unless specifically exempted (e.g., very young children in some scenarios, though checking current rules is always best), needs a valid Washington fishing license. This applies whether you're a resident or a nonresident.
- Residents: If you reside in Washington State, you'll need a resident saltwater fishing license, or a combination license that includes saltwater privileges. These are typically available for annual periods. Make sure you understand What Counts as a Washington Resident for Licensing.
- Nonresidents: If you're visiting Washington, you'll need a nonresident saltwater fishing license. Washington offers different options, including annual and short-term licenses (e.g., 1-day or 3-day options), which can be perfect for a single halibut trip. Our Washington Fishing License Guide for Nonresidents can help you determine the best option.
Regardless of your residency, it's crucial that your license is current and that you have it physically with you or accessible on an approved electronic device (like the MyWDFW app) while fishing. This is a common point of compliance checks by WDFW enforcement officers.
How Bag and Possession Limits Work in Washington for Halibut
Bag and possession limits are critical components of halibut regulations. These rules dictate how many fish you can keep per day and how many you can have in your possession at any given time.
- Daily Bag Limit: For halibut, this is usually one fish per angler per day. This limit is very strict and applies whether you're fishing from your own boat or on a charter. You cannot keep more than one halibut in a 24-hour period, even if you go out on two separate trips.
- Possession Limit: This refers to the total number of fish you can have at home, in your vehicle, or otherwise under your control. For halibut, the possession limit is often tied to the daily limit, meaning you can't accumulate multiple daily limits. If the daily limit is one, your possession limit is also usually one. However, always verify this specific detail in the current regulations, as rules can sometimes differ between daily and possession limits for other species. For a general overview of these rules, check out How Bag and Possession Limits Work in Washington.
These limits are enforced to manage the total harvest and prevent individuals from taking more than their fair share. It's essential to understand that once you've retained your one halibut, you are usually done fishing for halibut for the day, even if you continue fishing for other species. Check the regulations carefully for any exceptions or specific "when fishing for halibut" rules.
Understanding Size Limits and Other Specific Rules
Beyond licenses and bag limits, halibut fishing often comes with very specific size restrictions, gear requirements, and potential area closures.
- Size Limits: Halibut regulations frequently include a minimum size limit and sometimes even a maximum size limit (a "slot limit"). For instance, you might be allowed to keep one halibut measuring between 32 and 46 inches, or a single halibut under a certain length. These slot limits are designed to protect spawning-age fish or particularly large, reproductively valuable individuals. Always carry a measuring device on your boat and measure your fish immediately upon landing to ensure it falls within the legal slot. Releasing an oversized or undersized halibut properly is just as important as keeping a legal one.
- Gear Restrictions: Barbless hooks are often required for halibut fishing in Washington, as they are for many salmon and steelhead fisheries. Circle hooks may also be mandated or highly recommended to reduce mortality of released fish. You are typically allowed to use only one line per angler when targeting halibut. Understanding Barbless Hook Requirements on Washington Rivers (and applicable marine areas) is vital.
- Reporting Requirements: While specific catch record cards for halibut are not always required in the same way they are for salmon and steelhead, knowing how to report your catch if required, or at least how to account for it, is important. You will often need to write down the marine area fished and date on your punch card. If you are on a charter, the captain will usually handle the reporting aspect for the vessel's total catch, but you are still responsible for your personal daily limit.
Always consult the official WDFW Sport Fishing Rules pamphlet (often downloadable as a PDF) or their website directly. Regulations can change quickly, sometimes even mid-season due to emergency rule changes. A quick check before each trip is the best way to stay legal and avoid unnecessary penalties.
Safety First: Preparing for Offshore Adventures
Offshore halibut fishing on the Washington coast can be an incredible experience, but the open ocean demands respect and thorough preparation. Unlike fishing in a calm lake, marine conditions can change rapidly, and being unprepared can turn a dream trip into a dangerous situation.
Vessel Readiness and Essential Safety Gear
Before you even think about leaving the dock, your vessel must be in top condition. This means checking your engine(s), fuel levels, battery charge, and all vital systems. A breakdown miles offshore is not just inconvenient; it can be life-threatening.
- Engine Check: Ensure your main engine is serviced and running smoothly. If you have a kicker motor, confirm it's also in good working order and has its own fuel supply.
- Fuel Management: Plan your fuel carefully. A good rule of thumb for offshore trips is the "one-third rule": one-third of your fuel to get out, one-third to get back, and one-third in reserve for emergencies or unexpected conditions.
- Navigation & Communication: Have reliable GPS and chart plotter. Carry multiple forms of communication: a VHF radio (with a range sufficient for offshore, ideally DSC capable), a cell phone in a waterproof bag, and consider a satellite communication device (like a Garmin InReach or Spot device) for truly remote areas where cell service is non-existent.
- Required Safety Gear: The U.S. Coast Guard mandates specific safety equipment for all recreational vessels. This includes life jackets for everyone on board (properly sized), visual distress signals (flares), sound-producing devices (horn or whistle), a fire extinguisher, and a throw cushion or ring. Check the latest Coast Guard requirements regularly.
- Additional Safety Gear: Beyond the mandatory, consider an Emergency Position Indicating Radio Beacon (EPIRB) or Personal Locator Beacon (PLB), which can broadcast your location to rescue services if you get into serious trouble. A well-stocked first-aid kit is essential, as is extra water and food, especially for longer trips. A good quality anchor, chain, and plenty of line are also crucial for emergencies or just holding position over a good spot.
Battling Seasickness and Staying Comfortable
Seasickness can ruin an otherwise perfect trip, and for some, it's a constant battle. The key is prevention and proper preparation.
- Medication: Over-the-counter medications like Dramamine or Bonine can be very effective, but they need to be taken before you start to feel sick, ideally the night before or at least an hour before departure. Some people find success with prescription patches like Scopolamine.
- Food and Drink: Avoid greasy or heavy foods before and during your trip. Opt for bland, easily digestible snacks like crackers or pretzels. Stay hydrated with water; avoid excessive caffeine or alcohol.
- Fresh Air and Horizon: Try to stay on deck in fresh air, avoiding enclosed spaces. Fix your eyes on the horizon, as this helps your brain reconcile conflicting signals from your inner ear and eyes.
- Comfort: Dress in layers to adapt to changing temperatures. Offshore can be surprisingly cold, even on sunny days, and rain is always a possibility. Good quality rain gear is a must. Bring a comfortable chair if you're not on a charter, as long hours of standing can be tiring. Good quality sunglasses and a wide-brimmed hat will protect you from the sun and glare.
- Motion Sickness Bands: Some anglers find relief with acupressure wristbands like Sea-Bands, available on Amazon. While not universally effective, they are drug-free and worth a try.
Communicating and Planning Your Offshore Trip
No matter how experienced you are, never fish alone. Always have at least one other competent person on board. Before you leave, tell someone on shore your float plan: where you're going, your expected return time, and who is with you. If you don't check in by your designated time, they should know to contact the Coast Guard.
Planning involves more than just picking a day. Discuss roles on the boat (who's driving, who's watching lines, who's netting/gaffing). Ensure everyone knows basic safety procedures and where the emergency gear is located. If you're going with a charter, listen carefully to the captain's briefing. They are the experts in offshore safety and navigating the specific challenges of halibut fishing. A well-planned and communicated trip is a safe trip, and a safe trip is a successful trip.
From Ocean to Table: Handling Your Halibut Catch
The reward for all that effort, preparation, and skill is a magnificent Pacific halibut. However, the work isn't over when the fish comes over the rail. Proper handling and processing are crucial to ensure that the delicious meat is preserved in its prime condition.
Proper Care for Your Halibut Onboard
Once you've landed your legal halibut, immediate and proper care will make a huge difference in the quality of the meat.
- Bleeding: This is arguably the most important step for quality. As soon as the halibut is secured on deck, bleed it immediately. You can do this by cutting the gills or making a deep cut across the throat near the gills. This allows the blood to drain from the fish's system, which significantly improves the flavor and shelf life of the fillets.
- Icing: After bleeding, get the fish onto ice as quickly as possible. A large cooler filled with ice slurry (a mix of ice and a little saltwater) is ideal. The colder you can get the fish, the better. This slows bacterial growth and keeps the meat firm. Avoid letting the fish sit in warm bilge water or direct sunlight. If you plan to bring a large fish home whole, ensure your cooler is appropriately sized. Many anglers bring large marine coolers (like those from Yeti or RTIC, often available on Amazon) specifically for this purpose.
- Minimize Stress: Handle the fish as little as possible once it's on the boat. Rough handling can bruise the meat, leading to a less appealing final product. For large fish, a gaff or tail rope might be necessary to bring it aboard safely, but once in the boat, try to keep it from flopping around excessively.
For released fish, try to unhook them quickly at the boat side if possible. If you must bring them onboard for measuring, do so gently, handle them with wet hands or a wet towel, and release them headfirst, allowing water to flow over their gills. If a halibut is struggling or showing signs of barotrauma (due to pressure changes from deep water), consider using a descending device to help it return to depth, though WDFW rules typically focus on rockfish for this requirement.
Filleting and Preparing Your Fresh Halibut
Filleting a halibut, especially a large one, is a skill in itself. A sharp, flexible fillet knife and a stable cutting surface are essential. Halibut yield four large fillets – two from the top side and two from the bottom.
- The Four Fillet Method: Start by making a cut down the center of the halibut's back, from head to tail. Then, make a cut behind the gills, running down to the belly. From there, you'll work your knife along the bone structure, separating the meat from the backbone and ribs. Repeat this for all four sections. Practice makes perfect, and watching a few online tutorials beforehand can be very helpful.
- Skinning: Once you have your four fillets, you'll need to skin them. Place the fillet skin-side down, hold the tail end firmly, and work your knife along the skin, separating the meat. A good fillet knife makes this process much easier.
- Portioning: After skinning, you'll have large, boneless, skinless fillets. You can then portion these into steaks or smaller fillets suitable for individual servings. Remove any darker, blood-lined areas of meat along the centerline, as these can have a stronger flavor. Trim off any fat, as it can sometimes impart an oily taste.
Storing Your Catch for Long-Term Enjoyment
With a prized halibut, you'll want to ensure it lasts. Proper storage is key to maintaining its quality for months.
- Fresh Consumption: For immediate use, keep fresh fillets in the refrigerator, ideally in an airtight container or vacuum-sealed, and consume within 2-3 days.
- Freezing: This is how most anglers preserve their halibut.
- Vacuum Sealing: This is by far the best method. Vacuum-sealed fillets, free of air, can last 6-12 months or even longer in a deep freezer without freezer burn. Invest in a good quality vacuum sealer; it's worth it for preserving your catch.
- Water Glazing: If you don't have a vacuum sealer, you can water glaze. Place fillets in freezer bags, fill with water until the fish is completely submerged, and then freeze. This creates a protective ice layer that prevents freezer burn, but it can be a bit messier.
- Portioning: Before freezing, portion your fillets into meal-sized servings. This way, you only thaw what you need.
- Labeling: Always label your frozen packages with the date and the type of fish. You'll be surprised how quickly you forget what's what in a packed freezer!
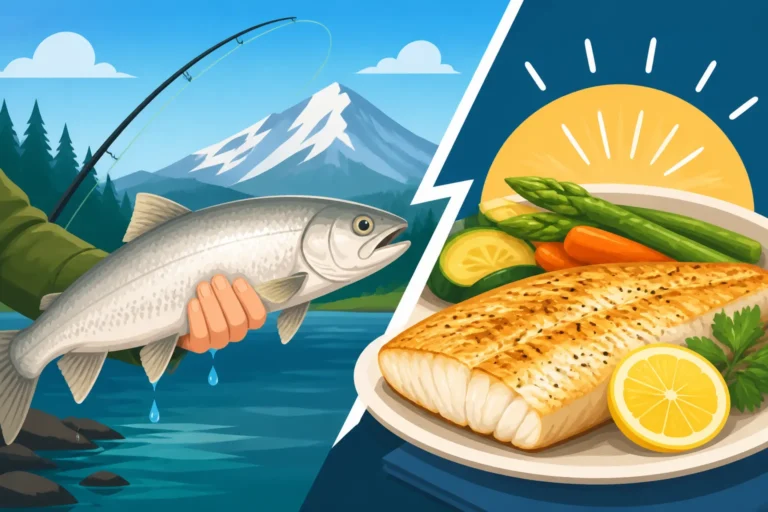
A well-cared-for halibut provides delicious meals long after the thrill of the catch has faded. From fresh-grilled halibut cheeks to baked halibut steaks, the culinary possibilities are endless. Enjoy the fruits of your labor!
Disclaimer
This article is for general informational purposes only and does not constitute professional advice. Laws, prices and regulations vary by location and change over time. Consult a qualified professional for guidance on your specific situation.