Best Way to Rig Herring for Puget Sound Chinook
There’s a unique thrill, and often a fair bit of frustration, that comes with targeting Chinook salmon in Washington’s vast Puget Sound. These powerful, intelligent fish, often called "Kings," can be elusive, and getting your presentation just right is absolutely critical. If you've spent hours trolling with little to show for it, wondering if your bait isn't swimming quite right, you're not alone. This comprehensive guide will walk you through the most effective and time-tested methods for rigging herring specifically for Puget Sound Chinook, helping you increase your chances of hooking into that prized catch.
Why Herring Is the Go-To Bait for Puget Sound Chinook
For generations of Washington salmon anglers, herring has remained king when it comes to baiting Chinook. It’s not just tradition; there are very real, biological reasons why this baitfish is so effective. Chinook salmon are apex predators, and their diet in the marine environment primarily consists of smaller baitfish like herring. When a Chinook sees, smells, or feels the vibration of a properly presented herring, it triggers a primal strike instinct that few artificial lures can truly replicate.
The natural oil content in herring creates an irresistible scent trail in the water, dispersing odors that draw in hungry salmon from a distance. Unlike a hard plastic lure, a herring’s flesh is soft, allowing for a more natural feel when a salmon strikes, often leading to a more committed bite. Moreover, when rigged correctly, a herring can mimic the injured, struggling swimming action of a real baitfish, making it an easy target for a predatory Chinook. Understanding these fundamental advantages is the first step in appreciating why the meticulous art of herring rigging is so vital.
Essential Components of a Puget Sound Herring Rig
Before we dive into the step-by-step rigging process, let’s talk about the gear you’ll need. Having the right components on hand is crucial for building a durable and effective rig that can withstand the powerful runs of a Chinook salmon. Skimping on quality here can mean the difference between landing a trophy and telling a sad story about the one that got away.
Choosing the Right Herring Size
The size of your herring is paramount and often depends on the size of the Chinook you're targeting and the time of year. Generally, in Puget Sound, you'll be using smaller herring sizes for "blackmouth" (resident Chinook) and larger sizes for the big ocean-run Kings during peak seasons.
- Small (3-5 inches): Often referred to as "green label" or "purple label" herring, these are excellent for smaller blackmouth, especially in shallower waters or when the salmon are keyed in on juvenile bait. They offer a more subtle presentation.
- Medium (5-7 inches): "Blue label" herring are incredibly versatile and probably the most common choice for general Puget Sound Chinook fishing. They're a good all-around size that mimics many of the available baitfish.
- Large (7-9 inches): "Red label" or "orange label" herring are reserved for when you're specifically targeting those large, aggressive ocean-run Chinook. These baits move a lot of water and present a substantial meal.
Always choose herring that are firm, intact, and as fresh as possible. Frozen herring should be thawed slowly in saltwater or refrigerated brine, never in freshwater or a microwave, as this can damage their scales and make them mushy, affecting their swim. You can find excellent quality frozen herring at most local tackle shops or even purchase bulk quantities online from retailers like Amazon for convenience, ensuring you always have a supply on hand.
Hooks, Leaders, and Swivels
The terminal tackle for your herring rig needs to be robust and precisely chosen to ensure proper action and secure hooksets.
- Leader Material: A fluorocarbon leader is highly recommended for Puget Sound Chinook. Its near-invisibility underwater and abrasion resistance are major advantages. For general Puget Sound fishing, a 25-40 lb test fluorocarbon leader is common, with heavier leaders (e.g., 50 lb) preferred when targeting large Kings or fishing around structure. The length typically ranges from 4 to 6 feet, providing a natural presentation behind your flasher or diver.
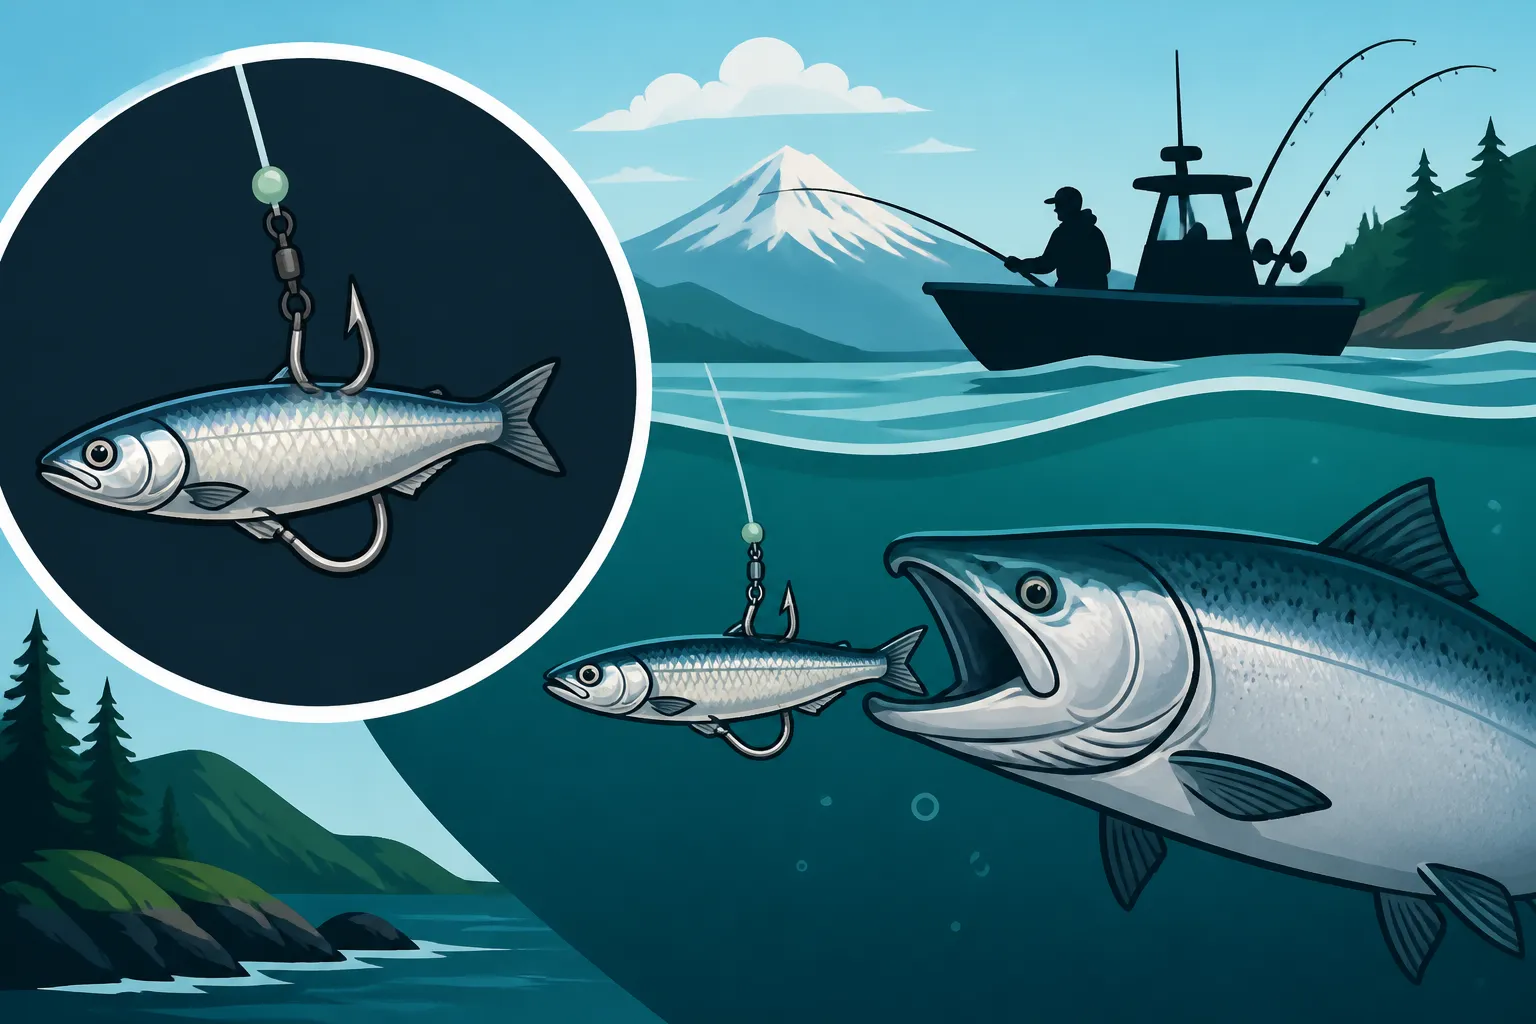
- Hooks: Most Puget Sound anglers opt for a tandem hook setup. This usually involves two single hooks, typically sizes 1/0 to 4/0, depending on herring size. Some anglers prefer a single hook in the nose and a small treble hook as a "stinger" in the tail, but single hooks are often preferred for easier release if you encounter a wild, unmarked fish. The goal is to have one hook near the head to secure the bait and another near the tail for maximum hooking potential, ensuring it can penetrate the tough jaw of a Chinook. Look for sharp, strong, black-nickel or bronze hooks designed for salmon fishing.
- Swivels: You'll need a good quality barrel swivel (size 7 or 8) to connect your leader to your main line or the terminal end of your flasher. This prevents line twist, which is critical when trolling a spinning bait. A small, high-quality snap swivel can also be used on the flasher end for quick changes.
Step-by-Step Guide to Rigging Your Herring
Now for the main event: getting that herring to swim like it’s alive and panicking. There are a few ways to achieve this, but the "rotary" or "pin" rig is overwhelmingly popular and effective for Puget Sound Chinook. It creates a tight, natural rotation that drives Chinook wild.
The Rotary or Pin Rig Method
This method is designed to impart a specific, enticing spin to your herring. It might seem tricky at first, but with a little practice, you'll be rigging like a pro.
- Prepare Your Leader: Start by cutting a 5-6 foot section of your chosen fluorocarbon leader. Tie your barrel swivel to one end using a reliable knot like a Palomar or improved clinch. This is the end that will attach to your main line or flasher.
- Attach the First Hook (Trailer Hook): Thread the other end of your leader through the eye of your trailer hook (the one that will sit near the tail). Position this hook about 4-6 inches from the end of the leader. Secure it with a snell knot or an egg loop knot, ensuring it’s firmly in place. This knot allows the hook to sit parallel to the leader, reducing fouling and improving hook-ups.
- Attach the Second Hook (Lead Hook): Measure up about 4-6 inches from your trailer hook (the exact distance depends on your herring size; it should allow the two hooks to span the length of your herring). Secure your lead hook (the one that will go in the head) to the leader using a snell or egg loop knot. Again, ensure it’s tight. At this point, you should have two hooks snelled onto your leader, separated by a span that matches your herring.
- Prepare the Herring: Take your thawed herring. If it's still stiff, gently flex it to loosen it up. Locate the anal vent. This will be your entry point for the "pin."
- Insert the Pin/Bait Holder: This is the critical step for achieving the spin. Many anglers use a specialized bait pin (often a thin, stiff wire with a small eye or bend at one end) or a pre-made "herring helmet" or "rotary bait holder." If using a pin:
- Carefully insert the pin into the anal vent of the herring.
- Push the pin straight through the body of the herring, aiming for the center of the head, just behind the eyes. It should exit cleanly from the top of the head.
- Bend the pin slightly at the head end, creating an offset angle. This bend is what will cause the herring to spin. The amount of bend controls the tightness of the spin. A subtle bend usually creates a wide, natural roll, while a sharper bend produces a tighter, faster spin.
- Attach the Lead Hook to the Pin: Once the pin is through, take the lead hook (the one closest to the swivel) and run its point through the small eye or bend of the pin that's protruding from the herring's head. This secures the herring to your leader via the pin. If you're using a bait holder, the leader threads directly through it, and the bait holder grips the herring, creating the desired spin.
- Position the Trailer Hook: Finally, gently place the trailer hook so it lies freely near the tail section of the herring. It should be able to swing freely to catch any short-striking fish. Some anglers lightly embed the tip of the trailer hook in the herring’s flank to prevent it from fouling during deployment, but ensure it pulls free easily on a strike.
Adjusting for the Perfect Spin
The key to the rotary rig is getting that perfect, irresistible spin. After rigging, test your herring in the water next to the boat before deploying.
- Too Little Spin (Wobbling): If the herring just wobbles or moves erratically, you might not have enough bend in your pin. Pull the herring off the lead hook, remove the pin, and put a slightly more aggressive bend in it before re-inserting.
- Too Much Spin (Twisting Line): If it's spinning too fast and twisting your line excessively, you've got too much bend. Reduce the angle of the bend in the pin. The ideal spin is a slow, wide roll that makes the herring look like it's trying to escape. This is often described as a "death roll."
- Checking Regularly: Check your herring frequently, perhaps every 15-30 minutes, or after any missed bite. Chinook teeth and rough trolling can quickly ruin a herring's action. A fresh, properly spinning herring is far more effective.
You can often find pre-rigged bait holders or bait pins designed for this exact purpose on Amazon or at local tackle shops. These can simplify the process, especially for beginners.
Advanced Tips and Common Pitfalls
Mastering the herring rig goes beyond just getting the hooks in place. It involves a continuous process of refinement, observation, and understanding the nuances of Puget Sound Chinook behavior.
Scent Enhancements
While herring already has a potent natural scent, many seasoned anglers like to add extra scent attractants to give their bait an edge, especially in off-color water or during slow bites. Anise, sardine, or herring-based scents are popular choices. You can apply these directly to the herring, or inject them into its body cavity for a longer-lasting release. Many companies make convenient scent gels and oils that are easy to apply. Remember, a little goes a long way; you don't want to overpower the natural appeal.
Brining for Durability
Brining your herring is an age-old trick that dramatically improves its durability and firmness, allowing it to withstand longer trolling periods and more strikes without falling apart. A simple brine recipe typically involves:
- Non-iodized salt (like rock salt or pickling salt)
- Water
- Optional: powdered milk (to whiten the bait and add shine), borax (for firmness), or food coloring (blue or green are popular).
Mix the ingredients to create a strong saltwater solution. Submerge your thawed herring in the brine for several hours or overnight in the refrigerator. The herring will firm up considerably, become tougher, and hold its scales better, all while retaining its natural scent.
Matching the Hatch
Pay attention to what the Chinook are actually feeding on. If you notice local bait schools are smaller or larger than your herring, adjust your size accordingly. Sometimes, a subtle change in bait size can turn a slow day into a hot bite. Observing what baitfish are in the area can often be as simple as looking for birds diving or checking the stomach contents of your first caught fish.
The Importance of Speed and Depth
While rigging is about the bait's presentation, its effectiveness is deeply intertwined with how you present it through the water column. For detailed insights into how these factors work together, you might want to check out our guide on Trolling for Salmon in Washington's Puget Sound If you're fishing in Marine Area 9, for example, understanding the specific depths Chinook prefer during certain times of year, and how that relates to your herring, is key. Our article on Depth Washington Chinook Hold at in Summer can provide invaluable insights.
Common Mistakes to Avoid
- Mushy Bait: Using herring that isn't properly thawed or brined will result in bait that falls apart quickly and doesn't spin correctly. Always aim for firm, fresh-looking herring.
- Improper Spin: A herring that tumbles, wobbles, or spins too fast looks unnatural. Take the time to fine-tune the pin's bend until you achieve that perfect, slow, injured-fish roll. This is the single most important aspect of successful herring rigging.
- Dull Hooks: Always check your hook points. Chinook have incredibly tough mouths. A dull hook will lead to missed bites and frustrating losses. Keep a hook file or sharpener handy.
- Too Much Leader Slack: Ensure your knots are tight and there's no unnecessary slack in your leader setup. Any looseness can dampen the herring's action.
- Ignoring Local Regulations: Always consult the most current WDFW regulations for Washington Sport Fishing Seasons and Emergency Closures and Puget Sound Salmon Closures: What Washington Anglers Need to Know before heading out. Rules can change frequently, and being caught with an illegal fish or in a closed area can lead to significant penalties.
The Role of Your Setup
A perfectly rigged herring is only part of the equation. Your entire setup, from rod to boat speed, plays a role in how that herring performs. To ensure you have the best chance of success, consider exploring our guide on the Rod and Reel You Need for Washington Puget Sound Salmon. This will help you pair your meticulously rigged herring with the appropriate gear for maximum effectiveness.
Understanding when Chinook are most active in the Sound, often referred to as "blackmouth" for resident fish, is also crucial. For insights into the best times to target these magnificent fish, take a look at our article on When Chinook Salmon Run in Washington's Puget Sound. Combining proper rigging with knowledge of Best Tides for Puget Sound Salmon Fishing in Washington can significantly boost your success rates. After all, knowing How to Identify a Washington Chinook Salmon once you've hooked it is just as important as knowing how to catch it! For a broader overview of these amazing fish, check out our piece on Chinook Salmon: Washington's King of Fish. If you're new to the area, exploring Washington's Puget Sound Fishing Spots for Salmon and Bottomfish can give you a head start on where to deploy your perfectly rigged herring.
| Component | Purpose | Key Considerations | Where to Find |
|---|---|---|---|
| Herring | Primary bait, natural scent & action | Freshness, size (3-9 inches), firmness (brine) | Local tackle shops, Amazon (for bulk frozen) |
| Fluorocarbon Leader | Near-invisible line for stealth & abrasion resistance | 25-50 lb test, 4-6 ft length, reputable brands | Tackle shops, sporting goods, Amazon |
| Single Hooks | Secure hook-up, easier release | 1/0 – 4/0 size, sharp points, strong shank | Tackle shops, sporting goods, Amazon |
| Bait Pin/Holder | Creates rotary spin of the herring | Stiff wire, proper bend for desired roll, or pre-made holders | Tackle shops, online retailers (e.g., Amazon) |
| Barrel Swivel | Prevents line twist | Size 7-8, high quality, strong for salmon | Tackle shops, sporting goods |
| Scent Attractant | Enhances natural herring odor | Anise, sardine, herring oil; gel or liquid | Tackle shops, Amazon |
Disclaimer
Fishing regulations in Washington State, especially for salmon in Puget Sound, are subject to frequent changes by the Washington Department of Fish and Wildlife (WDFW). Always consult the most current WDFW Fishing Regulations pamphlet or their official website for emergency rule changes before heading out on any fishing trip. The information provided in this guide is for general educational purposes only and should not be considered a substitute for official regulations.