Razor Clam Digging Seasons and Tides
There's nothing quite like the excitement of hitting the Washington coast for a razor clam dig. You’ve packed your gear, driven for hours, and the anticipation is building, only to arrive and find out the dig was canceled or the tides aren't quite right. It's a frustrating experience many of us have faced, leaving us wondering how to ever get the timing right. This comprehensive guide is here to unravel the mysteries of razor clam digging seasons and tides in Washington, ensuring your next trip is filled with bucket-filling success, not disappointment.
The Irresistible Allure and Unpredictable Nature of Razor Clam Digging
For many Washingtonians, and even visitors from afar, razor clam digging isn't just about collecting shellfish; it's a cherished tradition, a unique outdoor adventure, and a chance to connect with our stunning coastline. But this beloved pastime comes with its own set of challenges, primarily the dynamic and often last-minute changes to seasons and the critical importance of understanding tides.
Why Razor Clams Are So Popular in Washington
Pacific razor clams ( Siliqua patula ) are, simply put, a culinary delight. Their sweet, firm, and tender meat makes them a highly sought-after delicacy, whether fried, in chowder, or used in other creative dishes. Beyond their taste, the act of digging itself is an experience. Imagine standing on a vast, windswept beach at night, flashlight beam cutting through the fog, surrounded by fellow clam enthusiasts, all scanning the sand for the tell-tale "show" of a clam. It’s a primal, communal hunt that creates lasting memories.
Washington’s coastal beaches, particularly Long Beach, Copalis, Mocrocks, and Twin Harbors, are renowned for their abundant razor clam populations. These aren't just any beaches; they are perfect habitats for these fast-burrowing bivalves, offering miles of soft sand and nutrient-rich waters. The thrill of spotting that subtle dimple or "show" in the sand, plunging your shovel or clam gun, and feeling the tug of a clam trying to escape is incredibly addictive. For many, it's more than just a meal; it's a quintessential Pacific Northwest experience.
The Challenge of Timing Your Dig
The biggest hurdle for anyone planning a razor clam adventure is the inherent unpredictability. You can't just decide on a whim to go digging next Saturday. Seasons are announced, often with short notice, and are heavily dependent on factors that are constantly monitored by state wildlife agencies. And even when a season is announced, choosing the right tide window is paramount.
It’s easy to get frustrated when you see an opening announced, make plans, perhaps even book a hotel, only to have it canceled days later due to biotoxins or unfavorable weather. This isn't unique to clamming; even salmon anglers often grapple with Emergency Rule Changes: Why Washington's Rules Shift Mid-Season. This constant state of flux makes planning difficult and adds a layer of complexity that can deter even the most eager digger. Understanding why these changes happen and how to stay informed is the first step in mastering the art of the Washington razor clam dig.
Understanding Washington's Razor Clam Management
The dynamic nature of razor clam seasons isn't arbitrary. It's the result of meticulous monitoring and scientific assessment by the Washington Department of Fish and Wildlife (WDFW), often in collaboration with tribal co-managers. Their goal is to ensure both public safety and the long-term sustainability of this precious resource.
The Role of WDFW in Setting Seasons
The WDFW takes its role as steward of Washington's fisheries and shellfish resources very seriously. When it comes to razor clams, they aren't just guessing; they're employing a rigorous scientific approach. Their biologists conduct pre-season population assessments, estimating the number of clams on each beach through extensive surveys. This data is crucial for setting sustainable harvest quotas, ensuring enough clams are left to reproduce and maintain healthy future populations.
Based on these assessments, they propose digging dates, but these are always contingent. Think of them as tentative plans, subject to change. The WDFW website is the go-to source for all official announcements, and learning to navigate it is key for any serious clammer. They also operate a hotline for quick updates, especially useful for those last-minute checks before heading out.
Factors Influencing Season Openings and Closures
Several critical factors can swing a proposed digging season wide open or slam it shut. It’s a delicate balance that fishery managers must maintain, with public health and resource conservation at the forefront.
- Biotoxins and Public Health: This is, without a doubt, the most common reason for closures. Razor clams, being filter feeders, can accumulate naturally occurring marine toxins produced by certain types of algae. The most well-known of these is Paralytic Shellfish Poisoning (PSP), but others like Domoic Acid (Amnesic Shellfish Poisoning or ASP) and Diarrhetic Shellfish Poisoning (DSP) are also monitored. WDFW biologists regularly test clam samples from all harvestable beaches. If toxin levels exceed state and federal safety thresholds, the season for that beach will be closed immediately, regardless of how good the clam population is. This is a non-negotiable safety measure.
- Clam Population Levels: While robust populations are the goal, sometimes a beach might not have enough harvestable clams to warrant an opening, or to support the expected pressure from diggers. If pre-season surveys show a declining trend, WDFW might limit openings or close a beach entirely to allow the stock to recover. This is part of responsible resource management.
- Tribal Co-Management: Washington has a unique and important relationship with its treaty tribes. Many of the coastal beaches are part of co-managed areas, and tribal harvest rights are a significant consideration in setting public seasons. The WDFW works closely with tribal co-managers to ensure equitable access and sustainable harvest for all.
- Weather and Beach Conditions: While less common for full closures, extreme weather can certainly impact planned digs. High winds, dangerous surf conditions, or even heavy rainfall can sometimes lead to cancellations, especially if they make digging unsafe or impractical.
- Human Waste and Water Quality: Less frequently, localized issues such as elevated levels of bacteria from human waste can lead to temporary closures, though this is more common in inland Puget Sound shellfish areas than the vast coastal razor clam beaches.
Understanding these variables helps immensely when you're checking the WDFW announcements. It's not just about if the clams are there, but if they're safe to eat and if the resource can handle the pressure.
Deciphering Razor Clam Digging Seasons
The razor clam digging calendar isn't a fixed, predictable schedule. It's more like a dance between biological cycles, environmental conditions, and management decisions. However, there are general patterns that emerge throughout the year that can help you anticipate when and where you might find an opening.
The General Season Structure
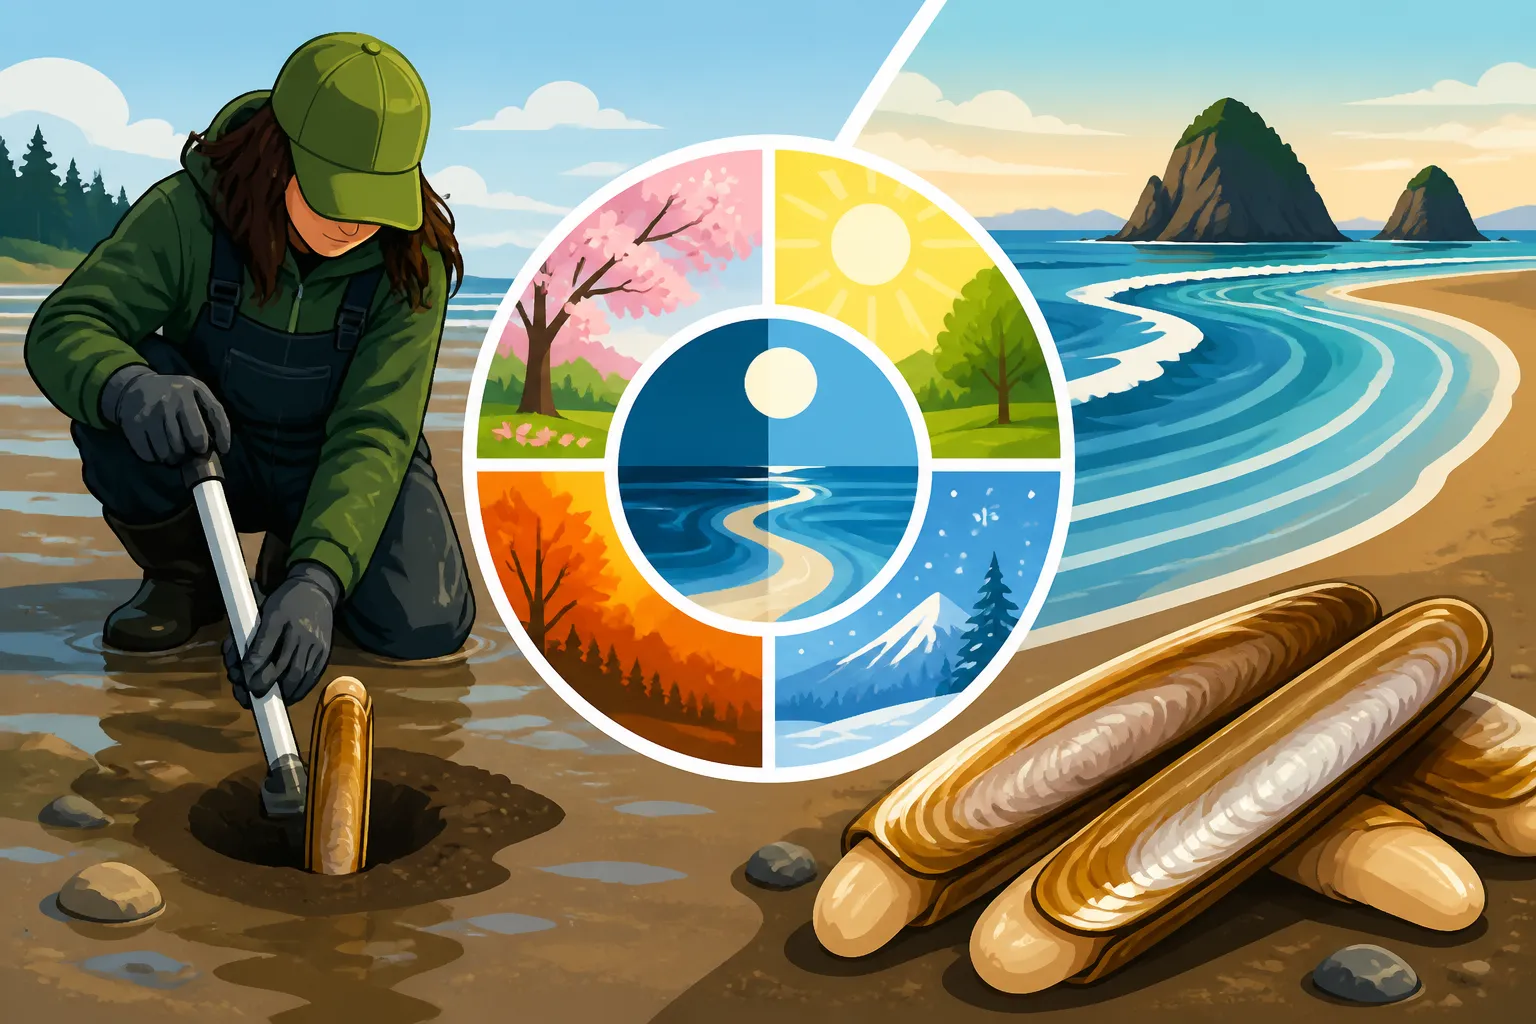
Washington's razor clam digging typically follows a three-season structure: fall, winter, and spring. Each season has its own characteristics and appeals.
- Fall Season (October-December): This is often the most anticipated season. After a summer closure, clam populations have had time to grow, and the weather, while potentially wet, can offer some beautifully crisp digging nights. Long Beach, Copalis, Mocrocks, and Twin Harbors usually see their first openings of the year during this period. The fall digs often coincide with evening low tides, meaning you're often out there in the dark with a headlamp, which adds to the adventure.
- Winter Season (January-March): As the days get shorter and the weather gets colder, winter digs can be a bit more challenging. However, they also often offer some of the largest, fattest clams of the year. The weather can be rough, with strong winds and rain, but hardy diggers are often rewarded. Many of the same beaches will rotate through openings, depending on their quota and biotoxin levels. This season might see more daylight low tides, which can be a welcome change for some.
- Spring Season (April-May): The spring season marks the final push before the summer closure, allowing clams to reproduce. These digs often occur during daylight hours, taking advantage of the spring's extremely low tides. The weather can be milder, making for a more comfortable digging experience. This is a favorite for families, as kids can participate more easily in the daylight. Sometimes, specific beaches might be managed for a spring-only dig if their populations need more recovery time during other seasons.
It's important to remember that not all beaches open at the same time, or for the same duration. For instance, Copalis might have an opening, while Long Beach remains closed due to elevated biotoxins. Keeping an eye on the specific beach announcements is crucial.
How Emergency Rule Changes Impact Digging
As mentioned earlier, razor clam seasons are incredibly susceptible to last-minute changes. This is where the term "emergency rule changes" comes into play, and it’s a concept familiar to anyone who follows Washington Sport Fishing Seasons and Emergency Closures. The WDFW has the authority to issue these changes for various reasons, with public safety and resource conservation being paramount.
Imagine you've planned a trip to Long Beach for a weekend dig, meticulously checking the WDFW website for the initial announcement. Then, just a few days before, you get the dreaded news: "Due to elevated levels of marine toxins, the razor clam opening at Long Beach scheduled for [dates] has been canceled." This happens, and it's disappointing, but it's for your safety. These changes are not made lightly; they're based on real-time data from clam testing.
These emergency rules aren't just for closures, either. Sometimes, if a population is stronger than anticipated or toxin levels drop quickly, WDFW might announce additional digging days or even open a beach that wasn't initially scheduled. The key is to check the very latest information before you head out. Don't rely on last week's news.
Common Beaches and Their Typical Seasons
While seasons are variable, certain beaches are consistently popular and generally receive the most attention from WDFW management and clam diggers. Knowing their general patterns can help you anticipate upcoming opportunities.
- Long Beach: Located in Pacific County, this is perhaps the most famous and longest continuous beach, stretching over 28 miles. It's often one of the first to open in the fall and sees consistent attention throughout the season. Its sheer size means it can accommodate a huge number of diggers.
- Copalis Beach: In Grays Harbor County, this beach includes Ocean Shores, Copalis, and Roosevelt Beach. It's another highly productive area, often opening alongside or shortly after Long Beach. It's known for having a good density of clams.
- Mocrocks Beach: Also in Grays Harbor County, Mocrocks encompasses the area from Copalis River to the north jetty of Grays Harbor. This beach tends to be managed slightly differently from Copalis and Twin Harbors, sometimes opening when others are closed, or vice-versa. It's a favorite for many local diggers.
- Twin Harbors Beach: Stretching from the south jetty of Grays Harbor to Willapa Bay in Pacific County, Twin Harbors is another major producer. Like Copalis, it's often open during peak seasons.
- Kalaloch Beach: Further north in Jefferson County, within Olympic National Park, Kalaloch sometimes opens for razor clam digging but often for a much shorter, more limited season. Access can be more restricted, and it's essential to check park regulations in addition to WDFW rules.
Each beach has its own personality, and over time, you might find a favorite. Remember that the specific boundaries and designations for these beaches can be found in the Reading the Washington Sport Fishing Regulations Pamphlet, which is an invaluable resource for any Washington angler or clammer.
Mastering the Tides for Successful Digging
Even if the season is wide open and biotoxin levels are safe, your clamming success hinges on one crucial natural phenomenon: the tide. Without the right tide, those elusive razor clams remain safely buried beneath the sand.
Why Low Tides Are Crucial
Razor clams are masters of burrowing, capable of digging several feet down in a matter of seconds. To effectively harvest them, you need the ocean to recede as far as possible, exposing the clam beds. This means you're looking for what are called "negative tides" or "minus tides."
A low tide simply means the water level is at its minimum for a given cycle. However, a negative low tide means the water level drops below the average low tide mark, sometimes by several feet. This extra exposure is critical. During a typical low tide, you might find clams in the surf line, but a truly negative tide will reveal vast expanses of beach that are usually submerged, bringing the prime clamming grounds within reach. The lower the tide goes, the more accessible the clams become, and the longer your digging window.
Imagine standing on the beach as the water literally pulls back, revealing fresh, undisturbed sand. This is when the "shows" become apparent – those tell-tale dimples or tiny holes in the sand that betray a clam's presence just beneath the surface. Without these extremely low tides, the clams are too deep, or the waves are too strong, making digging nearly impossible and definitely less productive.
Reading a Tide Chart
Successfully reading a tide chart is probably the most practical skill you can develop for razor clamming. It's not just about knowing when low tide is, but how low it will be, and then calculating your optimal digging window.
Tide charts, available online (NOAA is a great resource) or in local bait shops, list the times and heights of high and low tides for specific locations. When planning a clam dig, you'll be looking for the lowest negative tide of the day.
Here's how to break it down:
- Identify the Date and Location: Make sure you're looking at the correct date and for the specific beach or a nearby reference point (e.g., Westport for Copalis and Twin Harbors, or Ilwaco for Long Beach).
- Find the Lowest Tide: Scan the "Low" tide entries for the lowest negative number. For instance, a tide of -1.5 feet is much better than a tide of 0.2 feet. The more negative the number, the more beach will be exposed.
- Determine Your Digging Window: The prime digging window usually starts about 1.5 to 2 hours before the absolute lowest tide and continues for about an hour after it. So, if the lowest tide is at 6:00 PM, you'd want to be on the beach and ready to dig by 4:30 PM, and you could continue effectively until around 7:00 PM. This gives you roughly a 2.5 to 3-hour window of peak opportunity. If you arrive right at low tide, you've already missed a significant portion of the optimal digging time.
Many experienced diggers will even factor in moon phases, as full and new moons are associated with the strongest tidal fluctuations, often yielding the lowest negative tides. This precise timing is crucial for maximizing your chances of hitting your daily limit, which, by the way, is covered in detail in our guide on How Bag and Possession Limits Work in Washington.
Factors Beyond Just Low Tide
While a negative low tide is absolutely essential, it's not the only thing that contributes to a successful dig. Several other factors play a significant role in your experience and overall success.
- Daylight vs. Night Digs: Many of the best low tides, especially in fall and winter, occur at night. This means headlamps, lanterns, and good batteries are crucial. Night digs have a unique atmosphere and can sometimes be more productive as clams are less disturbed. Spring often brings daylight low tides, which are fantastic for families and those who prefer not to dig in the dark. Be prepared for either, and make sure your gear is appropriate.
- Clam "Shows": Even on a perfect low tide, you need to be able to spot the clams. Razor clams reveal their presence through "shows" – small dimples or doughnut-shaped depressions in the sand. Learning to spot these takes practice, but once you get your eye in, you'll see them everywhere. Waves, foot traffic, and even heavy rain can obscure shows, making digging harder.
- Weather Conditions: While not a deal-breaker like biotoxins, weather definitely impacts the comfort and ease of digging. Strong winds can make spotting shows difficult as sand blows around. Heavy rain, especially during a night dig, can be miserable without proper gear. Conversely, a calm, crisp night or a sunny spring day can make the experience even more enjoyable. Always check the local forecast for the specific beach you plan to visit.
- Crowd Factor: Popular low tides, especially on weekends, can draw massive crowds. While it's part of the fun, more people mean more competition for prime spots and more disturbed sand. If you're looking for a quieter experience, consider digging on a weekday or during a less accessible tide (e.g., a very early morning dig).
Understanding these nuances helps you plan not just a successful dig, but an enjoyable one.
Essential Gear and Preparation for Your Dig
You’ve got the season and tide sorted, now what? Having the right gear isn't just about comfort; it's about efficiency and effectiveness. Improper tools or clothing can quickly turn a fun outing into a cold, wet, frustrating ordeal.
The Must-Have Tools for Clamming
Don't show up with just any old gardening shovel. Razor clams are fast, and you need tools designed to keep up with them.
- Razor Clam Shovel: This isn't your average garden spade. A proper razor clam shovel is narrow, long, and often has a slightly cupped blade. This design allows you to dig a compact, deep hole quickly, getting down to the clam before it burrows away. It's often favored by traditionalists and those who prefer the physical workout.
- Clam Gun (or Clam Tube): This is a hollow cylinder, usually made of PVC or stainless steel, with a handle and sometimes a vent hole near the top. You push it into the sand around the clam's show, cover the vent hole (if present) to create suction, and pull up a core of sand. It's a faster, less physically demanding method, especially popular for those with back issues or who want to maximize their harvest quickly. You can find a good selection of clam guns and shovels on Amazon, often with options for different heights and materials.
- Bucket or Mesh Bag: You need something to hold your precious catch! A sturdy 5-gallon bucket is standard for most diggers. Some prefer a mesh bag that allows water to drain, especially useful if you're carrying them some distance.
- Light Source (for Night Digs): If you're digging at night, a reliable, bright headlamp is non-negotiable. Hands-free is key. A secondary lantern or spotlight can also be helpful for illuminating a wider area or for emergencies. Make sure you have fresh batteries, and perhaps spares!
- Clam Net (optional): Some diggers use a small mesh net attached to their belt or bucket to temporarily hold clams as they dig, keeping them clean of sand before transferring to the main bucket.
Don't forget the importance of having the right tools, which we detail further in our specific guide, Tools You Need for Razor Clam Digging.
Dressing for Success
The Washington coast, even on a "nice" day, can be unpredictable. Being prepared for varying weather is crucial for comfort and enjoyment.
- Waterproof Outerwear: This is perhaps the most important clothing item. A waterproof jacket and pants are essential, even if rain isn't in the forecast. Mist, sea spray, and the wet sand itself will soak you through if you're not protected. Look for gear that is truly waterproof, not just water-resistant.
- Layers: Beneath your waterproof shell, wear layers of insulating clothing. Fleece, wool, or synthetic materials are excellent choices as they retain warmth even when damp. Avoid cotton, as it loses all insulating properties once wet.
- Waterproof Boots: Wading in the surf and walking on wet sand means your feet need protection. Knee-high rubber boots (like XTRATUF or Bogs) are ideal. Make sure they're comfortable for walking, as you might cover some serious ground.
- Gloves: Your hands will get cold and wet. Waterproof or water-resistant gloves will make a huge difference, especially on chilly night digs.
- Hat: A warm beanie or a waterproof hat will help retain body heat, especially if it's windy.
Being well-dressed means you can focus on the clams, not on shivering. There's nothing worse than cutting a dig short because you're too cold and wet.
Licensing and Catch Cards
Just like fishing, razor clam digging in Washington requires proper licensing and a catch record card. This isn't just bureaucracy; it's how WDFW manages harvest data and ensures compliance.
- Fishing License: For razor clams, you'll need a valid Washington fishing license that covers shellfish. A combination license is usually the best bet as it covers both freshwater, saltwater, and shellfish. If you're a non-resident, be aware that Washington Fishing License Guide for Nonresidents details the specific requirements and costs that differ from resident licenses.
- Catch Record Card: For razor clams, a special endorsement is usually printed directly on your license, and you'll need to mark down your catch before leaving the beach. This is critically important. Failing to properly record your catch can result in fines. Our comprehensive guide on The Washington Catch Record Card and What It Requires provides all the details you need to ensure you're compliant.
- Daily Limit: There's a strict daily limit for razor clams, typically 15 clams per person, regardless of size or condition. Each digger must dig their own clams and keep them in a separate container. You cannot pool your catch with others. Once you hit your limit, you must stop digging.
Always carry your license with you – either a physical copy or via the MyWDFW app on your phone. Game wardens regularly patrol the beaches, especially during popular digs, and they will check for licenses and proper recording.
Finding Current Digging Information
The biggest challenge with razor clam digging isn't the digging itself, but knowing when and where to go. Official sources are your best friends here.
Official WDFW Resources
When it comes to razor clam seasons, don't trust rumors or outdated social media posts. Go straight to the source.
- WDFW Website: The official Washington Department of Fish and Wildlife website (wdfw.wa.gov) is the ultimate authority. Look for the "Shellfish/Seaweed" section, and specifically the "Razor Clams" page. This is where all season announcements, updates, and closure notices are posted. Make it a habit to check this page frequently in the weeks leading up to any anticipated dig.
- WDFW Razor Clam Hotline: For quick, last-minute updates, the WDFW operates a dedicated razor clam hotline. The number is (360) 249-4628. This recorded message is updated regularly, especially when emergency changes occur, making it a valuable tool to check just before you leave home.
- Email Alerts: You can sign up for WDFW's email notification system to receive alerts directly to your inbox about season openings, closures, and other important news regarding razor clams. This is an excellent way to stay informed without constantly checking the website.
These resources are designed to provide the most accurate and up-to-date information, directly from the agency managing the resource. Make them your primary source for planning. You can also find broader regulatory information by referring to Where to Find Current Washington Fishing Rules.
Staying Ahead of Closures
Given how quickly seasons can change, developing a strategy for staying ahead of potential closures is vital to avoid disappointment.
- Check Frequently: Don't just check once a week. If a dig is announced, check the WDFW website or hotline daily, especially in the 2-3 days leading up to the scheduled opening. Biotoxins can spike unexpectedly, leading to very late cancellations.
- Understand the Biotoxin Monitoring Cycle: WDFW typically collects clam samples a week or so before a proposed dig. However, toxin levels can change rapidly. A beach might test safe early in the week, but by Thursday, new samples could show unsafe levels. This is why last-minute cancellations are a real possibility.
- Have a Backup Plan (if possible): If you're traveling a long distance, consider if there's an alternative activity or nearby attraction you can enjoy if your clam dig gets canceled. Sometimes, one beach might be closed while another is still open, so keep an eye on all potential digging locations.
Being proactive and realistic about the possibility of changes will help manage expectations and prevent unnecessary frustration.
Community and Local Knowledge
While official sources are paramount, local knowledge and community chatter can sometimes provide helpful insights, though always cross-reference with WDFW.
- Local Bait and Tackle Shops: Shops near the coastal beaches (e.g., in Ocean Shores, Long Beach, or Westport) are often excellent sources of information. Staff there live and breathe fishing and clamming, and they'll know about local conditions, where the clams are showing well, and what gear is performing best. They're often the first to hear about local rumors or see the effects of weather on the beaches.
- Online Forums and Social Media Groups: There are many active online communities dedicated to Washington fishing and clamming. These can be great places to get anecdotal reports, ask questions, and learn from experienced diggers. However, always verify any information about season openings or closures with the official WDFW channels. Misinformation spreads quickly online.
- Local Accommodations: If you're staying at a hotel or rental in a coastal town, ask the staff if they have any local insights. They often cater to clam diggers and might have heard news or observed conditions.
These unofficial sources can add flavor to your trip planning, but should never replace the official word from WDFW.
Maximizing Your Razor Clam Harvest
Once you're on the beach, with the right tide and valid license, it's time to put your skills to the test. Finding and digging razor clams effectively requires a keen eye and a bit of technique.
Locating the "Shows"
Razor clams don't just sit on the surface waiting for you. They're buried, and your first task is to find evidence of their presence, known as "shows."
- The Dimple: The most common and easiest-to-spot show is a small, circular dimple or depression in the sand, often about the size of a dime or quarter. This is created by the clam withdrawing its siphon (the tube it uses to feed and breathe) into the sand.
- The Doughnut: Sometimes, especially in softer sand or after a wave has receded, you might see a small mound of sand with a hole in the middle, resembling a tiny doughnut. This is another clear sign of a clam.
- The "Squirt": If you walk through an area and feel a slight give underfoot, or if a wave washes over a clam and it squirts a tiny jet of water, you've found a clam. These are harder to predict but a dead giveaway.
- Look for Fresh Signs: Focus your efforts on the freshly exposed sand as the tide recedes. Areas that have been walked over repeatedly will have fewer visible shows. Walk slowly, scanning the sand just ahead of you. It takes practice to develop a "clam eye," but once you do, you'll start seeing them everywhere.
Effective Digging Techniques
Once you've spotted a show, you need to act fast. Razor clams are incredibly adept at burrowing, so speed and technique are key.
-
The Shovel Method:
- Position: Place your shovel about 4-6 inches seaward (towards the ocean) of the clam's show.
- Dig a Hinge: Push the shovel straight down to a depth of 12-18 inches, using the clam's show as the "hinge" of your hole.
- Lift and Clear: Gently pry up the sand, creating a cone-shaped hole that widens towards the bottom. Quickly scoop out the loose sand.
- Locate the Clam: As you clear sand, keep an eye out for the clam's neck or shell. Once you see it, reach in and grab it firmly. Be careful not to break the shell; a broken clam counts towards your limit but is less desirable.
- Pull Straight Up: Once you have a firm grip, pull the clam straight out of the sand. Don't yank or twist too hard, or you risk breaking it.
This method is covered in greater detail in our guide on How to Dig Razor Clams Without Breaking Them.
-
The Clam Gun Method:
- Position: Place the clam gun directly over the clam's show.
- Push and Twist: Push the gun straight down into the sand, using a slight twisting motion, until it's deeply embedded (18-24 inches is common, depending on gun length and clam depth).
- Cover Vent (if applicable) and Pull: If your gun has a vent hole, cover it tightly with your thumb to create suction. Then, pull the gun straight up, bringing a core of sand with it.
- Extract the Clam: Tip the sand core onto the beach and quickly sift through it to find your clam. If you missed it, look for another show and try again.
Practice makes perfect with either method. Don't get discouraged if you miss a few at first; it happens to everyone. The goal is to be fast and decisive.
Cleaning and Storing Your Catch
After a successful dig, the work isn't over. Proper cleaning and storage ensure your razor clams are delicious and safe to eat.
- Initial Cleaning on the Beach: Many diggers do a quick rinse of their clams in the ocean water to remove excess sand before putting them in their bucket. Some also purge them by putting them in a bucket of fresh seawater for a few hours, though this is debated among clamming aficionados.
- Cleaning at Home: This is where the magic happens.
- Blanching: The easiest way to clean a razor clam is to blanch it. Bring a pot of water to a rolling boil. Dip the clams (a few at a time) into the boiling water for just 10-20 seconds, or until their shells barely begin to open. Immediately plunge them into an ice bath to stop the cooking. This makes them easier to handle.
- Shucking and Trimming: The shell will now be slightly open. Carefully pry it fully open and separate the clam from the shell. Trim off the dark tip of the siphon, the digestive gland (dark blob), and the gills. You'll be left with the "neck," "digging foot," and "body."
- Pound and Slice (Optional): Many people like to gently pound the digging foot to tenderize it before cooking. The neck is often sliced open to clean out any remaining grit.
- Storage:
- Fresh: Cleaned clams can be stored in the refrigerator for a day or two in an airtight container.
- Freezing: For longer storage, cleaned clams freeze beautifully. Lay them flat on a baking sheet to flash freeze, then transfer to vacuum-seal bags or freezer-safe containers. They can last for several months in the freezer.
Properly cleaned and stored, your razor clam harvest will provide many delicious meals and fond memories of your Washington coast adventure.
Comparing Razor Clam Digging Beaches in Washington
To help you visualize the typical digging opportunities, here's a general comparison of Washington's primary razor clam beaches. Remember, specific opening dates and times are always subject to WDFW announcements.
| Beach | County | Typical Season Peaks | Characteristics | Best For |
|---|---|---|---|---|
| Long Beach | Pacific | Fall, Winter, Spring | Longest continuous beach (28 miles), very popular, vast area to spread out. | Families, first-timers (due to ample space), those looking for a classic PNW clamming experience. Easy access points along the peninsula. |
| Twin Harbors | Grays Harbor/Pacific | Fall, Winter, Spring | Extensive beach from Grays Harbor to Willapa Bay. Often has good clam density. | Consistent clamming, less crowded than Long Beach during peak times, good access near areas like Westport. |
| Copalis Beach | Grays Harbor | Fall, Winter, Spring | Includes Ocean Shores, Copalis, Roosevelt Beach. Highly productive, often opens concurrently with Twin Harbors. | High success rates, good for those staying in Ocean Shores or nearby accommodations. Can get busy around major access points. |
| Mocrocks Beach | Grays Harbor | Fall, Winter, Spring | From Copalis River to Grays Harbor north jetty. Often has specific openings, sometimes when other beaches are closed. | Those seeking slightly less crowded conditions than the central sections of Copalis or Long Beach, or when other beaches are closed due to localized issues. Known for good clam density. |
| Kalaloch Beach | Jefferson | Limited, Specific | Located within Olympic National Park. Access often more restricted, shorter seasons. | A more unique, scenic experience. Good for those camping or staying in the Olympic National Park area, willing to adhere to specific park rules. Less about volume, more about the setting. |
This table provides a snapshot, but as any seasoned digger knows, the actual experience can vary widely based on the specific tide, weather, and current clam populations.
Disclaimer
The information provided in this guide is for general informational purposes only and is not intended as legal advice or a substitute for official regulations. Washington's fishing and shellfish regulations, including razor clam seasons and limits, are subject to change frequently due to environmental conditions, conservation efforts, and emergency rule modifications by the Washington Department of Fish and Wildlife (WDFW). Always consult the official WDFW website, their dedicated razor clam hotline, or the most current WDFW Sport Fishing Regulations pamphlet before planning any fishing or clamming trip to ensure compliance with all applicable laws and safety guidelines. Failure to do so may result in penalties.