Razor Clams on Washington’s Ocean Beaches
Oh, the thrilling rush of the incoming tide, the salty air, and the anticipation of uncovering those elusive treasures buried deep beneath the sand – razor clam digging on Washington's ocean beaches is truly a quintessential Pacific Northwest experience! But let's be real, for newcomers, it can feel a bit overwhelming trying to figure out when to go, where to go, and what in the world you actually need to catch these slippery little guys without breaking them. This guide is going to walk you through every single step, from identifying the best beaches and gathering your gear to mastering the digging technique and understanding those sometimes-tricky regulations, so you can enjoy a successful and memorable clamming adventure.
The Allure of Washington's Razor Clams
There's something almost primal about heading out onto a vast, windswept beach at low tide, bucket and digging tool in hand, joining dozens or even hundreds of other eager diggers. It's a tradition deeply woven into the fabric of coastal life here in Washington, and for good reason. Razor clams aren't just a delicious meal; the entire experience of finding and harvesting them is an adventure in itself, often shared with family and friends.
Why Razor Clams Are So Sought After
Let's be honest, the main draw for many is the incredible taste of a fresh razor clam. These aren't your typical chewy bay clams or tough steamers. Razor clams have a delicate, sweet flavor and a tender texture that makes them truly stand out. They are incredibly versatile in the kitchen, lending themselves perfectly to simple frying, hearty chowders, or savory fritters. For many families, an annual razor clam dig isn't just about the food; it's about making memories. Generations gather on the sand, teaching kids the subtle art of spotting a "show" and the satisfying technique of the dig. It's a tangible connection to the natural bounty of our coast, a chance to slow down, breathe in the ocean air, and quite literally work for your dinner. This shared experience fosters a unique sense of community and connection that makes the effort entirely worthwhile.
Beyond the culinary delight and family fun, there's a unique satisfaction in self-harvesting seafood. It's a hands-on pursuit that connects you directly to the source of your food, offering a sense of accomplishment that a trip to the grocery store simply can't replicate. The sheer anticipation that builds up before an approved digging season opens, the scramble to check tide tables and pack the car, and the excitement of that first clam squirt are all part of the magic. It's a reminder of the wild beauty of Washington's coast and the incredible resources it provides, often under challenging, yet invigorating, conditions.
The Unique Ecosystem of Washington's Ocean Beaches
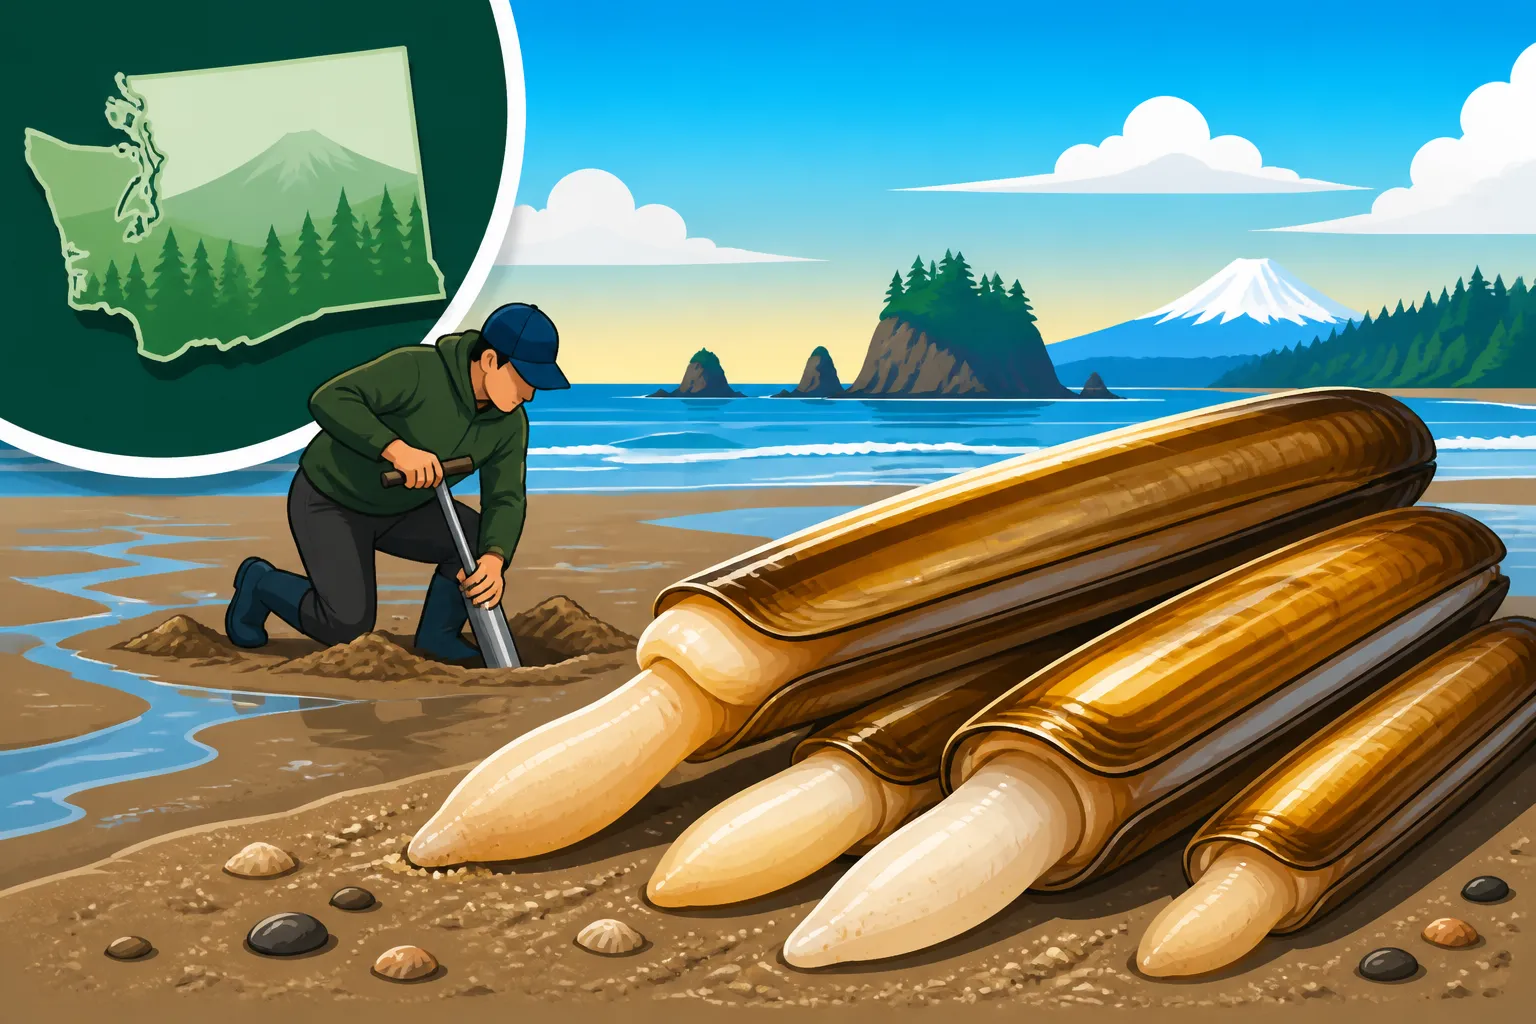
Razor clams, Siliqua patula, are incredibly particular about where they live, and Washington's extensive ocean beaches provide just the right conditions for them to thrive. These aren't rocky coves or sheltered estuaries. We're talking about vast, expansive stretches of hard-packed sand, often many miles long, that are directly exposed to the pounding surf of the Pacific Ocean. This unique environment is crucial for their survival and growth. The constant action of the waves helps to keep the sand aerated and provides a rich source of plankton and detritus, which the clams filter feed on.
The hard-packed nature of the sand is also key. Unlike softer, muddier bottoms where other clam species might flourish, razor clams need that firm substrate to quickly burrow deep into the sand, protecting themselves from predators and the fierce tidal action. These beaches, from Long Beach in the south to the northern reaches of Copalis, create an ideal habitat that is relatively stable, despite the dynamic forces of the ocean. This specific combination of geography, ocean currents, and sand composition is what makes Washington's coast a prime location, world-renowned for its razor clam populations. It’s a testament to a delicate ecological balance that allows these delicious bivalves to thrive, year after year, offering us these cherished digging opportunities.
Where to Dig for Razor Clams in Washington
Knowing where to go is almost as important as knowing when. Washington's coast offers several fantastic razor clam beaches, each with its own character and accessibility. The key is to understand how these beaches are managed and how to stay informed about openings.
Key Ocean Beaches for Razor Clamming
When WDFW announces a razor clam season, they'll specify which of the major coastal areas are open for digging. Each has its own charm and typical conditions:
- Long Beach: This is arguably the most famous and longest continuous stretch of clamming beach, running for miles along the southwestern coast. It's easily accessible and very popular, making it a bustling hub during an opening. You'll find plenty of amenities nearby, and it’s a classic choice for families. Due to its size, you can usually spread out, but expect crowds near popular access points.
- Twin Harbors: Located just south of Westport, this beach is another reliable producer. It's a bit shorter than Long Beach but offers excellent clamming, particularly during morning low tides. Access is generally good, and like Long Beach, it's well-loved by clammers from all over the state. The waves here can be quite energetic, adding to the classic coastal clamming experience.
- Copalis Beach: Situated north of Grays Harbor, this area includes the communities of Copalis Beach, Ocean Shores, and Ocean City. It's a consistently productive area, often yielding good-sized clams. It can be a bit more spread out than Long Beach, offering a slightly less crowded feel in some areas, though access points still draw many people.
- Mocrocks: This area lies north of Copalis, encompassing beaches near Pacific Beach and Moclips. It's often managed together with Copalis but can have distinct opening dates. Mocrocks is known for its strong clam populations and is a favorite among many experienced diggers. Both Copalis and Mocrocks are critical for monitoring and ensuring sustainable harvests.
It’s truly a special thing to visit these beaches and witness the sheer scale of the clamming activity during an opening. Whether you prefer the bustling energy of Long Beach or the slightly more remote feel of Mocrocks, each beach offers a unique slice of Washington's clamming culture.
Understanding Beach Management and Openings
Here's where things can get a little tricky, and it’s often the biggest frustration for aspiring clam diggers: razor clam seasons aren't set in stone months in advance. The Washington Department of Fish and Wildlife (WDFW) manages these fisheries very carefully to ensure sustainability and, critically, public safety. This means openings are often announced just a week or two before the actual digging dates, sometimes even less.
The primary reason for this last-minute scheduling is biotoxin monitoring. Razor clams, as filter feeders, can sometimes accumulate naturally occurring marine toxins, like domoic acid, which can be harmful or even deadly to humans if consumed. WDFW conducts rigorous pre-season and in-season test digs on each beach to collect clams, which are then analyzed for toxin levels. If levels are too high, the beach will remain closed. This scientific approach, while sometimes frustrating for those trying to plan a trip, is absolutely essential for your health and safety. You can't just head out any old time; you must wait for an official announcement. Razor Clam Digging Season on the Washington Coast will give you more context on how these seasons are determined.
Beyond biotoxins, WDFW also considers the overall health of the clam population on each beach. They assess clam abundance, size, and reproductive success to ensure that enough clams are left behind to sustain future generations. This careful stewardship means that some beaches might open more often than others, or have shorter seasons, depending on the results of their biological surveys. It’s a dynamic management system designed to balance recreational opportunity with the long-term health of this precious resource. This often means that if a beach shows signs of stress, WDFW will quickly implement closures to allow the population to recover.
Gear You'll Absolutely Need for a Successful Dig
You wouldn't go hiking without boots, and you shouldn't go razor clamming without the right gear! Having the proper tools makes all the difference between a frustrating, cold, and wet experience and a successful, enjoyable one. Don't underestimate the power of preparation, especially when facing the often-unpredictable Washington coast weather.
Essential Digging Tools
When it comes to getting those clams out of the sand, you have two main choices: the clam gun or the clam shovel. Both work, but many diggers develop a strong preference.
- The Clam Gun: This is essentially a cylindrical tube, usually made of PVC or stainless steel, with a handle on top. You push it down into the sand around the clam's "show," cap the vent hole with your thumb to create suction, and then pull up, bringing a plug of sand (and hopefully the clam!) with it.
- Pros: Less strenuous on your back, generally cleaner dig, easier to use for beginners once you get the hang of the suction. Can be very efficient. You can find a good range of clam guns on sites like Amazon, with different diameters and materials, allowing you to choose one that fits your height and strength.
- Cons: Can sometimes be bulky to carry, might require a bit of practice to get the suction just right, and in very soft sand, it can be difficult to pull up.
- The Clam Shovel: This isn't just any garden shovel. Clam shovels are typically narrow and long, with a slightly curved blade designed to penetrate the sand quickly without damaging the clam.
- Pros: Simple, sturdy, and effective for those who prefer a more traditional digging method. Some experienced diggers swear by the speed and control a shovel offers.
- Cons: More physically demanding, especially on your back, and it's easier to break a clam if you're not careful with your technique. You also tend to get a lot more sand flying around.
| Feature | Clam Gun | Clam Shovel |
|---|---|---|
| Effort | Less strenuous on the back, uses suction | More physically demanding, requires bending |
| Precision | Good for isolating clams, less sand moved | Can be precise with practice, more sand moved |
| Learning Curve | Slight learning curve for suction/pull | Easy to pick up, harder to master clam safety |
| Clam Damage | Lower risk of breaking clam with good technique | Higher risk of breaking clams if not careful |
| Portability | Can be bulky, but many have comfortable handles | Easy to carry, often more compact |
| Cost | Varies, but generally a mid-range investment | Varies, can be quite affordable for a basic one |
No matter which tool you choose, ensure it's robust enough for the job. Cheap plastic shovels won't stand up to the dense, wet sand for long. Many folks start with a basic shovel and, after a few trips, might upgrade to a clam gun, or even use both! For more details on tools, check out Tools You Need for Razor Clam Digging.
Proper Attire and Lighting
The Washington coast is beautiful, but it's also famous for its changeable weather. Being prepared for the elements is key to a comfortable and successful dig.
First and foremost, waders are your best friend. You'll be standing in the surf zone, possibly knee-deep in water, often for an hour or two. Neoprene chest waders are ideal as they offer warmth and waterproof protection. Make sure they fit well and that your boots have good traction on wet sand. Next, think layers for your upper body. It can be cold and windy, even on a sunny day. A waterproof and windproof jacket is absolutely essential, and underneath, fleece or wool layers will provide insulation. Don't forget a warm hat and waterproof gloves; cold hands can quickly ruin a good dig.
For night digs (which are incredibly popular and productive), a good headlamp is non-negotiable. You need both hands free to dig, and a headlamp illuminates your immediate work area, making it much easier to spot those subtle clam "shows." Bring extra batteries! Many diggers also bring a lantern or a larger floodlight for their staging area on the beach, but for the actual digging, a hands-free light source is paramount. Being comfortable and able to see what you're doing will directly impact your success and enjoyment.
Carrying Your Catch and Other Necessities
Once you've successfully dug your clams, you need a way to carry them safely and legally. A mesh clam bag is the traditional choice, as it allows water and sand to drain away, reducing the weight you have to carry. Plus, it’s easy to rinse your clams right in the bag when you get back to your vehicle. A five-gallon bucket also works well, especially if you want to keep them upright and minimize jostling.
Don't forget your Washington fishing license! Yes, even for clamming, you need a shellfish license. Make sure it's valid for the current season. Washington Fishing License Guide for Nonresidents can help you understand the requirements. You'll also need a catch record card if you're targeting clams that require one (razor clams usually do). Have a pen or pencil ready to fill it out immediately after harvesting your clams. This is not optional; it's a legal requirement. When a Catch Record Card Is Required in Washington provides more details. Beyond the essentials, a small backpack with water, snacks, and perhaps a thermos of hot coffee or tea can be a lifesaver on a chilly morning or late-night dig. And always, always bring a positive attitude – even if the clams are shy, the experience of being on the beach is worth it!
The Art and Science of Catching Razor Clams
This is where the magic happens! Spotting a clam, digging it, and putting it in your bucket is incredibly satisfying, but it takes a little bit of know-how and practice. It's truly an art form that gets easier with experience, but these tips will give you a solid head start.
Identifying the "Show"
This is perhaps the trickiest part for beginners, but it's also the most crucial. Razor clams are masters of camouflage, and they bury themselves just beneath the surface. What you're looking for is their "show"—the subtle disturbance they leave on the sand's surface as they retract their neck or siphon when disturbed.
- The Dimple: The most common "show" is a small, perfectly round depression or dimple in the sand, often about the size of a dime or a quarter. This is created when the clam retracts its siphon, leaving a tiny crater. It looks like someone pressed their thumb into the sand. You'll often see these more clearly as the tide recedes, leaving the sand exposed.
- The Donut: Sometimes, especially in wetter sand or if the clam is larger, you'll see a small ring of raised sand, forming a tiny "donut" shape with a hole in the middle. This is essentially the same action as the dimple, just with a slightly different sand consistency creating a raised edge.
- The Squirt: This is the easiest "show" to spot, though it's less common to see it before you've disturbed the clam. As the surf washes over the sand or as you walk by, a clam might squirt a small stream of water up from its siphon hole. This is a dead giveaway! If you see a squirt, mark that spot immediately.
The key to spotting these shows is patience, keen observation, and walking slowly, scanning the wet sand just as the waves recede. The light conditions can also play a huge role; sometimes the sun angle makes them pop, other times you have to train your eyes to the subtle differences in texture and elevation. Don't be afraid to ask experienced diggers for tips on the beach; most are happy to share their knowledge!
The Digging Technique: Gun vs. Shovel
Once you've spotted a "show," the clock is ticking, and it's time to dig! Razor clams are incredibly fast burrowers, so you need to act quickly and decisively.
Using a Clam Gun:
- Position: Center the opening of your clam gun directly over the clam's show.
- Push: Push the gun straight down into the sand, about 6-8 inches deep, aiming for behind the show (the clam will often be burrowed slightly away from its show, towards the ocean).
- Cap and Pull: Once the gun is sufficiently deep, cap the vent hole on the handle with your thumb to create suction. Then, slowly and steadily pull the gun straight up, bringing a plug of sand with it.
- Retrieve: Gently dump the sand plug onto the beach and look for your clam. Be careful not to drop it or break the shell.
Using a Clam Shovel:
- Position: Place the shovel about 4-6 inches seaward (towards the ocean) of the clam's show.
- Dig a Hinge: Drive the shovel straight down into the sand, making a vertical cut. Then, leaning on the shovel, create a "hinge" by pushing the handle down and back, effectively opening up a trench.
- Scoop and Grab: Quickly scoop out the sand from the trench, trying to reveal the clam. As soon as you see the top of the clam, reach in and grab it firmly but gently. Don't pull on the siphon or foot, as this can break the clam. Grab the entire shell.
- Fill the Hole: Always remember to fill your hole back in. It's good etiquette and helps keep the beach safe for others.
Regardless of your tool, speed is crucial. These clams are surprisingly quick! The moment you feel resistance or see the clam, grab it. Sometimes you'll dig and dig, only to find an empty hole. That's part of the game! For more in-depth advice on technique, check out How to Dig Razor Clams Without Breaking Them.
Mastering the Low Tide Window
Timing is absolutely everything when it comes to razor clamming. You can have the best gear and the keenest eye, but if you're not on the beach during the correct tide, you're out of luck. Razor clams are primarily harvested during the lowest minus tides, when the maximum amount of beach is exposed.
- The "Window": Generally, the best digging occurs about one to two hours before the published low tide, and for about an hour or two afterward. This three to four-hour window is when the ocean recedes furthest, exposing the prime clam beds. As the tide goes out, more and more "shows" become visible, and the clams are easier to dig because the sand isn't as saturated with water.
- Checking Tide Tables: It is absolutely essential to consult tide tables for your chosen beach well in advance. WDFW's opening announcements will always specify the low tide times for each approved date and beach. You need to align your arrival with this critical window. A good tide often means a good clam dig, but a bad tide means a completely unproductive one. How to Check Razor Clam Digging Tides will show you how to find this vital information.
- The Race Against the Tide: During this window, you'll be actively moving with the receding and then incoming tide. As the water pulls back, you'll often follow it, looking for shows in the freshest, exposed sand. As the tide starts to turn and come back in, you need to be mindful of your surroundings and make your way back towards higher ground. Safety is paramount, especially during night digs when the incoming tide can be disorienting. Always know where your exit points are and keep an eye on the water's edge.
Regulations, Limits, and Responsible Clamming
Part of being a responsible angler or digger in Washington is understanding and adhering to the rules. These regulations aren't there to make your life harder; they're designed to protect the razor clam population and ensure that this incredible resource remains viable for generations to come. Ignoring them can lead to fines and even loss of privileges, which nobody wants.
Understanding Daily Bag Limits and Possession Rules
This is one of the most important rules to memorize, and it's strictly enforced. For razor clams, the daily bag limit is the first 15 clams you dig, regardless of size or condition. This means if you dig a clam that's broken, too small, or you simply don't like the look of it, you still have to keep it and count it towards your limit of 15. You cannot pick and choose, throwing back clams in search of bigger or better ones. This rule is in place to prevent waste and to protect the clam population from excessive handling mortality.
- Daily vs. Possession Limits: While the daily bag limit is specific to the clams you dig on a single trip, a possession limit refers to the total number of clams you can have in your possession at any one time, whether they are fresh, frozen, or processed. For razor clams, the possession limit is typically also 15, meaning you can't go digging for 15 clams on Monday and then go back for another 15 on Tuesday if you still have all 15 from Monday in your cooler or freezer. Always verify current limits with the WDFW regulations pamphlet before you go. Understanding these limits is crucial for a lawful and sustainable harvest. How Bag and Possession Limits Work in Washington explains these concepts in more detail.
This "first 15" rule is unique compared to some other fisheries where you might be able to release certain fish. It requires diggers to be careful and intentional with every dig. It also means that even if you're aiming for a few big clams, if you only find small ones, those small ones count!
The Importance of the Catch Record Card
For razor clams, like many other salmon and steelhead species, you'll need to accurately fill out a Catch Record Card (CRC). This little card is more than just a piece of paper; it's a vital tool for WDFW to gather data on harvest rates, which helps them manage the resource effectively.
- When to Fill It Out: The rule is clear: you must record your catch immediately after you've completed your harvest for the day, and before you leave the beach. This means before you get in your car, before you drive away, and certainly before you get home. You need to record the date, the Marine Area (which is usually the specific beach, like Long Beach or Copalis), and the number of clams caught.
- Why It Matters: The data collected from CRCs helps WDFW understand how many clams are being harvested from each beach. This information, combined with their test digs and population assessments, informs their decision-making process for future season openings and limits. If harvest rates are too high, they might adjust future seasons to protect the population. It's a critical part of collaborative management between diggers and the state. Don't skip this step! How to Fill Out a Washington Catch Record Card goes into the specifics of proper completion, and When a Catch Record Card Is Required in Washington outlines when it's necessary.
Failing to fill out your catch card, or filling it out incorrectly, is a violation and can result in a fine. WDFW enforcement officers are often present on the beaches during openings, checking licenses and catch cards. It's a small but significant responsibility that every razor clammer shares.
Conservation and Ethical Digging Practices
Beyond the legal requirements, there's an unwritten code of ethics on the beach that every clammer should strive to uphold. This is about respect for the resource, the environment, and your fellow diggers.
- Fill Your Holes: This is perhaps the most fundamental courtesy. When you dig a hole, especially a deep one, you create a hazard for others walking on the beach, as well as for wildlife. Always take the time to fill in your holes completely and return the beach to its natural state.
- Leave No Trace: Pack out everything you pack in. This includes food wrappers, broken gear, and any other trash. Our beaches are precious, and leaving litter behind detracts from the experience for everyone and can be harmful to marine life.
- Respect Others: Be mindful of other diggers. Give them space, especially when they've found a productive spot. Razor clamming is a communal activity, and a little courtesy goes a long way. This includes not walking directly through someone's active digging area or shining your headlamp directly into someone's face during night digs.
- Follow Emergency Rules: WDFW can issue emergency rule changes even mid-season if conditions change rapidly (e.g., biotoxin levels rise unexpectedly). Stay informed by checking the WDFW website or social media before every trip. These rules are for everyone's safety and the health of the fishery. Reading the Washington Sport Fishing Regulations Pamphlet is a great resource, and ignoring these rules can lead to Fines and Penalties for Common Fishing Violations.
By practicing these ethical digging habits, you're contributing to a positive experience for everyone and helping to ensure that future generations can enjoy the same thrill of razor clamming on Washington's beautiful ocean beaches. It's about being a good steward of a cherished natural resource.
Post-Dig: Cleaning, Cooking, and Enjoying Your Harvest
You’ve done the hard work, braved the elements, and successfully filled your limit of beautiful razor clams. Now comes the equally rewarding part: getting them ready for the table! While some people might feel intimidated by cleaning, it's actually quite straightforward once you know the steps.
How to Clean Your Razor Clams
Cleaning razor clams might seem daunting, but it's a simple process that unlocks their delicious potential. The key is to be methodical and a little patient.
- Parboil (Optional, but Recommended): Many diggers opt to quickly parboil their clams. This makes shucking much easier as the clam relaxes and releases its grip on the shell. Bring a pot of water to a rolling boil. Dip the clams in for just 10-15 seconds, no longer, or they'll start to cook. Immediately transfer them to an ice bath to stop the cooking process.
- Shucking: After parboiling and cooling, the clam should be easier to open. Take a clam knife (or a sturdy butter knife) and carefully separate the clam from one half of its shell. The clam will come out as a whole, intact body. Discard the shells.
- Trimming and Cleaning:
- Separate Body Parts: You'll see the foot (the muscular part used for digging), the siphon (the "neck" or "neck-gut" that extends for feeding), and the gut mass.
- Open the Siphon: Slit the siphon down its length to expose the dark material inside. Rinse this thoroughly under cold running water to remove any sand or grit.
- Remove the Gills: The gills are feathery structures near the gut. Gently pull them away and discard them.
- Remove the Digestive Gland: This is the darkest, often greenish-black, part of the clam, typically located near the stomach. While some people keep a small amount of it for flavor in chowder, most clean it out for frying to ensure a cleaner taste and texture. It's usually a small, distinct sac.
- The "Digging String": Some people also remove a small, tough translucent membrane often called the "digging string" that runs along the foot. It's edible but can be chewy.
- Final Rinse: Give all the cleaned clam pieces a good final rinse under cold water to ensure all sand is gone. You'll be left with clean, white, and ready-to-cook clam meat.
This process might sound like a lot, but after you clean a few, you'll become incredibly efficient. The reward of perfectly cleaned, grit-free clam meat is absolutely worth the effort.
Popular Ways to Cook Razor Clams
Now for the fun part! Razor clams are incredibly versatile, but here are some classic preparations that highlight their delicate flavor:
- Fried Razor Clams: This is by far the most iconic and beloved way to prepare razor clams. After cleaning, many people slice the larger pieces (foot and siphon) into manageable sizes. Dip them in an egg wash, then dredge them in a seasoned flour or breadcrumb mixture. Pan-fry them quickly in hot oil (vegetable oil, canola oil, or even clarified butter) until golden brown and crispy, usually only 1-2 minutes per side. Overcooking will make them tough, so watch them closely! Serve with lemon wedges and tartar sauce. This simple preparation truly lets the clam's natural sweetness shine.
- Razor Clam Chowder: For those cold, blustery days, a hearty clam chowder hits the spot. Sauté diced bacon, onions, celery, and potatoes. Add clam broth (made from simmering some clam pieces or using bottled clam juice), milk or cream, and seasonings. Add your chopped razor clams at the very end, simmering just long enough to heat them through, again, to avoid toughness. This makes a rich, comforting meal that's perfect after a day on the beach.
- Razor Clam Fritters: Fritters are another fantastic way to enjoy your harvest, especially if you have a lot of smaller clam pieces. Mix chopped clam meat with flour, egg, milk, baking powder, and seasonings (like green onions, parsley, and a pinch of cayenne). Drop spoonfuls into hot oil and fry until golden brown. They make a great appetizer or a light meal.
Experimentation is key! Some adventurous cooks also enjoy razor clams in pasta dishes, as ceviche, or even grilled. The possibilities are endless once you have that fresh, clean clam meat in hand.
Storing Your Catch for Later Enjoyment
You've dug your limit, cleaned them meticulously, and now you have more delicious clam meat than you can possibly eat in one sitting. Proper storage is crucial to preserve that fresh-from-the-ocean flavor.
- Refrigeration: Fresh, cleaned clam meat can be stored in an airtight container in the refrigerator for 1-2 days. It's always best to cook and consume them as soon as possible after cleaning for optimal flavor and safety.
- Freezing: This is the most common method for long-term storage.
- Pat Dry: Lay the cleaned clam pieces out on paper towels and gently pat them dry. This helps prevent freezer burn.
- Vacuum Seal: The absolute best method for freezing is vacuum sealing. This removes all air, preventing freezer burn and preserving quality for up to a year or more.
- Freezer Bags: If you don't have a vacuum sealer, place the clams in heavy-duty freezer bags. Try to remove as much air as possible before sealing. Some people will add a small amount of clam broth or water to the bag to help prevent freezer burn, effectively freezing the clams in a block of ice.
- Date and Freeze: Label your bags with the date of harvest and freeze them flat.
- Canning: For those who enjoy home canning, razor clams can also be pressure canned for shelf-stable storage. This is a more involved process but results in a pantry-ready product. Always follow tested and approved canning recipes and safety guidelines.
No matter how you choose to store them, the key is to clean them thoroughly first. Sand and grit will only become more embedded during freezing. With proper cleaning and storage, you can enjoy the taste of Washington's razor clams long after the tide has come and gone. Happy digging, and even happier eating!
Disclaimer
This article is for general informational purposes only and does not constitute professional advice. Laws, prices and regulations vary by location and change over time. Consult a qualified professional for guidance on your specific situation.